Pages

Friday, July 31, 2015

CT Tags For Pink Paradox Productions - Using Kit "Paris In Pink"


♥CT for Pink Paradox Productions♥

The Gorgeous Scrap kit used is called ♥Paris In Pink♥

This fantastic kit is super !
 Fun to work with! Endless fun..

This kit comes with  160 Elements, 15 Frames, and 40 Papers
You can pick it up here for  30% off for a total $1.75
http://pinkparadoxproductions.com/store/index.php?main_page=product_info&cPath=1_2&products_id=574

In first creation ,  I used the art by © Alex_Prihodko - Tube name: Lucy
Tube can be purchased here:
http://picsfordesign.com/en/catalogue/id_104324_lucy.pix

In second creation, I used the art by © Alex_Prihodko - Tube name: Nicole
Tube can be purchased here:
http://picsfordesign.com/en/catalogue/id_112431_nicole.pix


New CT Tags For Fedor Using Tube **Charlize**


♥CT TAGS FOR FEDOR OFFICIAL FAN GROUP♥

Tube used is by Fedor called ♥Charlize♥

This gorgeous tube comes with + color variants clothing and hair
to chose from. You can find this gorgeous tube here


Tuesday, July 28, 2015

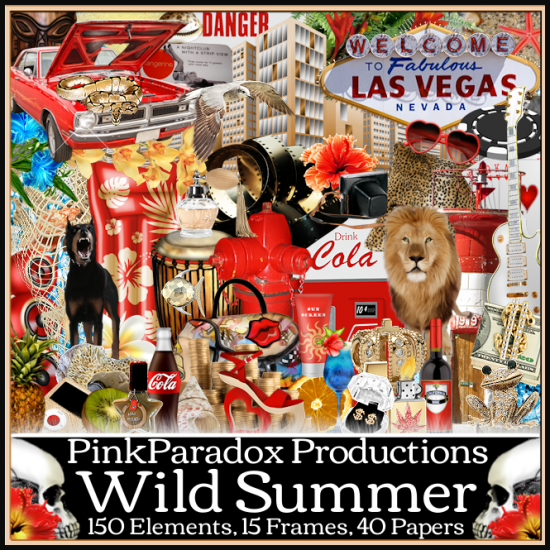
New CT Tutorial For PinkParadox Productions Using Kit **Wild Summer**


Wild Summer

This tutorial was written by me on July 28th, 2015. Any resemblance to any other tutorials is purely coincidental! You may not copy/paste any part of my tuts elsewhere, but you may text link to them for challenges etc!
*********
Supplies Needed:

**New CT Tag** Scrap Kit of choice, I am using a PTU Scrapkit called *Wild Summer* By Pink Paradox Productions.

You can find this kit and many other beautiful kits here.
http://pinkparadoxproductions.com/store/index.php?main_page=product_info&cPath=1_2&products_id=567

Tube or Image of choice, I am using a PTU Tube Called  *Felicia* By ©VeryMany
You can find this gorgeous tube here.
http://verymanytubes.com/tubes/felicia

Mask of choice
I used the mask called WSL_Mask302

Text of choice
My text is called Gill Sans MT Condensed Size 18 Bold

Program Used: Paint Shop Pro X7
****************
Let's Begin

650X650 New Image Canvas-Transparent BKgrnd

Open your tube
Copy & Paste to canvas. Resize and Position add to center of canvas.

Open Element (92)
Copy & Paste to bottom layer. Resize & Position add to center right behind tube. Flip by pressing ctrl+M.

Open Element (5)
Copy& Paste to layer just below tube. Resize & Position add to left side right beside tube and up against car. Flip ctrl+M.

Open Element (27)
Copy & Paste to bottom layer. Resize and Position add to left side of tube up behind element (92) as I have done.

Open Element (41)
Copy & Paste to layer just above element (92). Resize & Position add to left side as if on top of element (92).

Open Element (23)
Copy & Paste to layer just above element (92). Resize & Position add to right side as if under the hood of car.

Open Element (28)
Copy & Paste to top layer. Resize & Position add to right side bottom corner as I have done.

Open Element (30)
Copy & Paste to top layer. Resize & Position add to right side bottom up next to element (28).

Open Element (31)
Copy & Paste to layer just below element (30). Resize & Position add to right side up behind element (30). Rotate.

Open Element (29)
Copy & Paste to top layer. Resize & Position add to right side bottom up in front of element (30).

Open Element (34)
Copy & Paste to layer just below element (29). Resize & Position add to right side bottom up next to element (30).

Open Element (95)
Copy & Paste to layer just below element (5). Resize & Position add to left side bottom up beside element (5) as I have done.

Open Element (147)
Copy & Paste to top layer. Resize & Position add to center bottom in front of tube.

Open Element (88)
Copy & Paste to layer just below element (5). Resize & Position add to left side center of element (95).

Open Element (133)
Copy & Paste to layer just below element (31). Resize & Position add to center bottom behind element (147) right side. (Duplicate) mirror image your copy by pressing ctrl+B.

Open Element (134)
Copy & Paste to layer just below element (31). Resize & Position add to center bottom behind element (147) right side. (Duplicate) mirror image your copy by pressing ctrl+B.

Open Element (45)
Copy & Paste to layer just above tube. Resize & Position add to left side down next to flowers as I have done.

Open Papers (29)
Copy & Paste to bottom
Resize & Position to fit your canvas.

Add mask of your choice.
*******************************
Drop shadow used in all layers was
Vertical: 2  Horizontal: 2  Opacity: 65  Blur: 13.00
To finish add any other details and your copyright.
Make sure to save your work then you are finished.
*******************************
Hope this was easy and fun to follow!
Thanks for trying my tutorial.


Wednesday, July 22, 2015

New CT Tutorial For Ginnibug Designz Using Kit **Godilocks**


*Godilocks*

This tutorial was written by me  on July 22nd, 2015. Any resemblance to any other tutorials is purely coincidental! You may not copy/paste any part of my tuts elsewhere, but you may text link to them for challenges etc!
*********
Supplies Needed:

Scrap Kit of choice, I am using a PTU Scrapkit called *Godilocks* By Ginnibug Designz

You can purchase this kit from here:
Hanias Design: http://haniadesign.com/store/index.php?main_page=product_info&cPath=50_164&products_id=4953

Tube or Image of choice, I am using a PTU Tube *Girl and a Pony* By ©Laguna can be found here.
http://picsfordesign.com/catalogue/id_120095_girl_and_a_pony.pix

Mask of choice

Program Used: Paint Shop Pro X7 but any PSP should work.
****************
Let's Begin

650X650 New Image Canvas-Transparent BKgrnd

Open your tube of choice
Copy & Paste to top layer.  Resize & Position to left side toward bottom on canvas.

Open gle31
Copy &Paste to bottom layer. Resize & Position add to center right behind tube layer as I have done.

Open gle32
Copy & Paste to layer just below tube.  Resize & Position add to left side just behind tube.

Open gle51
Copy & Paste to layer just above gle31. Resize & Position add to right side up on gle31 as I have done.

Open gle5
Copy & Paste to layer just above gle51. Resize & Position add to right side bottom corner of gle51.

Open gle17
Copy & Paste to layer just below tube. Resize & Position add to right side bottom right behind tubes boots.

Open gle66
Copy & Paste to layer just below tube. Resize & Position add to right side bottom add as if in middle of other 2 bears.

Open gle96
Copy & Paste to layer just above gle32. Resize & Position add to center of gle32 as I have done.

Open gle77
Copy & Paste to layer just below tube. Resize & Position add to left side up behind tube.

Open gle21
Copy & Paste to bottom layer. Resize & Position add to right side up behind gle31 and gle32. Rotate. (Duplicate) mirror image copy by pressing ctrl+B.

Open gle23
Copy & Paste to layer just below gle96. Resize & Position add to center of gle32 just under gle96.

Open gle79
Copy & Paste to layer just above gle21. Resize & Position add to right side up in corner. Rotate

Open Smp17
Copy & Paste on bottom layer
Resize to canvas.

Then add mask of choice
Mask I used is called WSL_Mask302

Font used Fairy Strange Size 14 Bold 
*******************************
Drop shadow used in all layers was
Vertical: 2  Horizontal: 2  Opacity: 65  Blur: 13.00

To finish add any other details and your copyright.
Make sure to save your work then you are finished.
*******************************
Hope this was easy and fun to follow!
Thanks for trying my tutorial.


New CT Tags For Fedor Using Tube **Kaily**


♥CT TAGS FOR FEDOR OFFICIAL FAN GROUP♥

Tube used is by Fedor called ♥Kaily♥

This gorgeous tube comes with +7 layers of clothes
to chose from. You can find this gorgeous tube here
PFD: http://picsfordesign.com/catalogue/id_120222_kaily.pix


Tuesday, July 21, 2015

New CT Tutorial For PinkParadox Productions Using Kit **Coconut Cocktail**


Coconut Cocktail

This tutorial was written by me on July 21st, 2015. Any resemblance to any other tutorials is purely coincidental! You may not copy/paste any part of my tuts elsewhere, but you may text link to them for challenges etc!
*********
Supplies Needed:

**New CT Tag** Scrap Kit of choice, I am using a PTU Scrapkit called *Coconut Cocktail* By Pink Paradox Productions.

You can find this kit and many other beautiful kits here.
http://pinkparadoxproductions.com/store/index.php?main_page=product_info&cPath=1_2&products_id=553

Tube or Image of choice, I am using a PTU Tube Called  *Cosmo Babe* By ©Arthur Crowe
You can find this gorgeous tube here.
http://arthurcrowesfactory.com/store/index.php?route=product/product&filter_name=Cosmo%20Babe&page=4&product_id=638

Mask of choice
I used the mask called WSL_Mask302

Text of choice
My text is called AR DECODE Size 20 Bold

Program Used: Paint Shop Pro X7
****************
Let's Begin

650X650 New Image Canvas-Transparent BKgrnd

Open your tube
Copy & Paste to canvas. Resize and Position add to center of canvas.

Open Frames (4)
Copy & Paste to bottom layer. Resize & Position add to center below tube.

Open Element (114)
Copy& Paste to layer just below tube. Resize & Position add to left side top part of frame (4). Select Eraser Tool with it erase the bottom of element. (Duplicate) then mirror image by pressing ctrl+B.

Open Element (36)
Copy & Paste to top layer. Resize and Position add to left side bottom corner next to tube.

Open Element (37)
Copy & Paste to layer just below tube. Resize & Position add to center bottom below tube and next to element (36).

Open Element (1)
Copy & Paste to top layer. Resize & Position add to center bottom as if on element (37).

Open Element (20)
Copy & Paste to top layer. Resize & Position add to left side bottom up next to element (36).

Open Element (38)
Copy & Paste to layer just above element (37). Resize & Position add to right side bottom up behind element (1).

Open Element (21)
Copy & Paste to layer just above element (36). Resize & Position add to left side in front of element (36) as I have done.

Open Element (22)
Copy & Paste to top layer. Resize & Position add to left side bottom up in front of all elements as I have done. Flip.

Open Element (41)
Copy & Paste to layer just above (114). Resize & Position add to left side middle behind all bottom elements.

Open Element (60)
Copy & Paste to layer just above frames (4). Resize & Position add to right side bottom up behind beach ball.

Open Element (67)
Copy & Paste to layer just below element (60). Resize & Position add to center on canvas as I have done. Flip by pressing ctrl+M.

Open Element (71)
Copy & Paste to layer just above element (67). Resize & Position add to right side up behind sand castle. (Duplicate) flip copy.

Open Element (80)
Copy & Paste to layer just below element (71). Resize & Position add to center bottom. (Duplicate) Flip.

Open Element (98)
Copy & Paste to layer just below element (80). Resize & Position add to right side in front of element (71).

Open Element (2)
Copy & Paste to top layer. Resize & Position add to left side up in palm tree. Flip by pressing ctrl+M.

Open Element (11)
Copy & Paste to top layer. Resize & Position add to right side up in palm tree.

Open Element (12)
Copy & Paste to top layer. Resize & Position add to right side up in palm tree. Rotate.

Open Element (64)
Copy & Paste to layer just above element (114). Resize & Position add to right side as I have done.

Open Papers (26)
Copy & Paste to bottom layer. Resize & Position add to center to fit inside frames (4).

Open Papers (25)
Copy & Paste to bottom
Resize & Position to fit your canvas.

Add mask of your choice.
*******************************
Drop shadow used in all layers was
Vertical: 2  Horizontal: 2  Opacity: 65  Blur: 13.00
To finish add any other details and your copyright.
Make sure to save your work then you are finished.
*******************************
Hope this was easy and fun to follow!
Thanks for trying my tutorial.


Thursday, July 16, 2015

New CT Tutorial For PinkParadox Productions Using Kit **Summer Gypsy**


Summer Gypsy
This tutorial was written by me on July 16th, 2015. Any resemblance to any other tutorials is purely coincidental! You may not copy/paste any part of my tuts elsewhere, but you may text link to them for challenges etc!
*********
Supplies Needed:

**New CT Tag** Scrap Kit of choice, I am using a PTU Scrapkit called *Summer Gypsy* By Pink Paradox Productions.

You can find this kit and many other beautiful kits here.
http://pinkparadoxproductions.com/store/index.php?main_page=product_info&cPath=1_2&products_id=550

Tube or Image of choice, I am using a PTU Tube Called  *Miranda* By ©Verymany
You can find this gorgeous tube here.
http://verymanytubes.com/tubes/miranda

Mask of choice
I used the mask called WSL_Mask302

Text of choice
My text is called AR CENA Size 22 Bold

Program Used: Paint Shop Pro X7
****************
Let's Begin

650X650 New Image Canvas-Transparent BKgrnd

Open your tube
Copy & Paste to canvas. Resize and Position add to center of canvas.

Open Element (80)
Copy & Paste to bottom layer. Resize & Position add to right side middle next to tube.

Open Element (100)
Copy& Paste to bottom layer. Resize & Position add to center bottom as if tube is on the grass.

Open Element (132)
Copy & Paste to layer just below tube. Resize and Position add to right side up against tube as I have done.

Open Element (133)
Copy & Paste to layer just below tube. Resize & Position add to left side up next to tube and blend in with grass.

Open Element (134)
Copy & Paste to layer just below tube. Resize & Position add to left side blend in with element (133)

Open Element (143)
Copy & Paste to layer just above element (100). Resize & Position add to left side up behind tube. (Duplicate) with copy move to right side up behind element (80).

Open Element (38)
Copy & Paste to layer just below tube. Resize & Position add to left side next to tube on grass.

Open Element (41)
Copy & Paste to layer just below tube. Resize & Position add to right side as if under tubes leg.

Open Element (40)
Copy & Paste to layer just above element (80). Resize & Position add to right side down next to element (41).

Open Element (50)
Copy & Paste to top layer. Resize & Position add to left side up on element (143).

Open Element (194)
Copy & Paste to layer just below element (198). Resize & Position add to left side middle and blend in.

Open Element (87)
Copy & Paste to bottom layer. Resize & Position add to left side up behind all other elements and blend in.

Open Element (78)
Copy & Paste to top layer. Resize & Position add to right side up next to element (80) as I have done.

Open Element (82)
Copy & Paste to layer just below element (38). Resize & Position add to left side up behind element (38). (Duplicate) to make light brighter.

Open Element (2)
Copy & Paste to layer just above element (80). Resize & Position add to right side on steps of element (80).

Open Element (9)
Copy & Paste to top layer. Resize & Position add to left side as if on light post.

Open Element (156)
Copy & Paste to bottom layer. Resize & Position add to right side top of element (80). (Duplicate) add up top on left side.

Open Papers (33)
Copy & Paste to bottom
Resize & Position to fit your canvas.

Add mask of your choice.
*******************************
Drop shadow used in all layers was
Vertical: 2  Horizontal: 2  Opacity: 65  Blur: 13.00
To finish add any other details and your copyright.
Make sure to save your work then you are finished.
*******************************
Hope this was easy and fun to follow!
Thanks for trying my tutorial.