Pages

Showing posts with label Tube By Zlata_M. Show all posts

Tuesday, July 14, 2015

New CT Tutorial For PinkParadox Productions Using Kit **Steampunk Cafe**

Steampunk Cafe

This tutorial was written by me on July 14th, 2015. Any resemblance to any other tutorials is purely coincidental! You may not copy/paste any part of my tuts elsewhere, but you may text link to them for challenges etc!
*********
Supplies Needed:

**New CT Tag** Scrap Kit of choice, I am using a PTU Scrapkit called *Steampunk Cafe* By Pink Paradox Productions.

You can find this kit and many other beautiful kits here.
http://pinkparadoxproductions.com/store/index.php?main_page=product_info&cPath=1_2&products_id=558

Tube or Image of choice, I am using a PTU Tube Called  *Stella* By ©Zlata_M
You can find this gorgeous tube here.
http://zlatam.com/node/239

Mask of choice
I used the mask called RR_MaskSet23_3

Text of choice
My text is called SF Expresso Shack Size 14 Bold

Program Used: Paint Shop Pro X7
****************
Let's Begin

650X650 New Image Canvas-Transparent BKgrnd

Open your tube
Copy & Paste to canvas. Resize and Position add to center of canvas.

Open Frame (12)
Copy & Paste to bottom layer. Resize & Position add to center right behind tube.

Open Element (110)
Copy& Paste to layer just above frame (12). Resize & Positionadd to right side middle center on frame (12). Rotate

Open Element (108)
Copy & Paste to layer just above frame (12). Resize and Position add to left side middle center on frame (12).

Open Element (40)
Copy & Paste to layer just below tube. Resize & Position add to left side up next to tube as I have done.

Open Element (39)
Copy & Paste to layer just below element (40). Resize & Position add to left side up next to element (40).

Open Element (33)
Copy & Paste to layer just below tube. Resize & Position add to right side up next to tube as I have done.

Open Element (28)
Copy & Paste to top layer. Resize & Position add to right side left side up in front of the other elements.

Open Element (25)
Copy & Paste to layer just below tube. Resize & Position add to right side up against element (33).

Open Element (24)
Copy & Paste to top layer. Resize & Position add to right side up in front of element (25). Flip by pressing ctrl+M. Duplicate) add copy to the other side of your work and place where you wish.

Open Element (37)
Copy & Paste to just above tube layer. Resize & Position add to right side behind element (24).

Open Element (35)
Copy & Paste to layer just above element (110). Resize & Position add to right side up under element (110). Flip by pressing ctrl+M.

Open Element (118)
Copy & Paste to layer just above frame (12). Resize & Position add to right side up top as I have done.

Open Element (112)
Copy & Paste to layer just below tube. Resize & Position add to left side up top. Rotate.

Open Element (1)
Copy & Paste to top layer. Resize & Position add to left side on top of element (39).

Open Element (170)
Copy & Paste to top layer. Resize & Position add to center bottom of tube.

Open Papers (31)
Copy & Paste to bottom layer. Resize & Position add to center of frame and make it fit inside frame.

Open Papers (41)
Copy & Paste to bottom
Resize & Position to fit your canvas.

Add mask of your choice.
*******************************
Drop shadow used in all layers was
Vertical: 2  Horizontal: 2  Opacity: 65  Blur: 13.00
To finish add any other details and your copyright.
Make sure to save your work then you are finished.
*******************************
Hope this was easy and fun to follow!
Thanks for trying my tutorial.


Monday, April 13, 2015

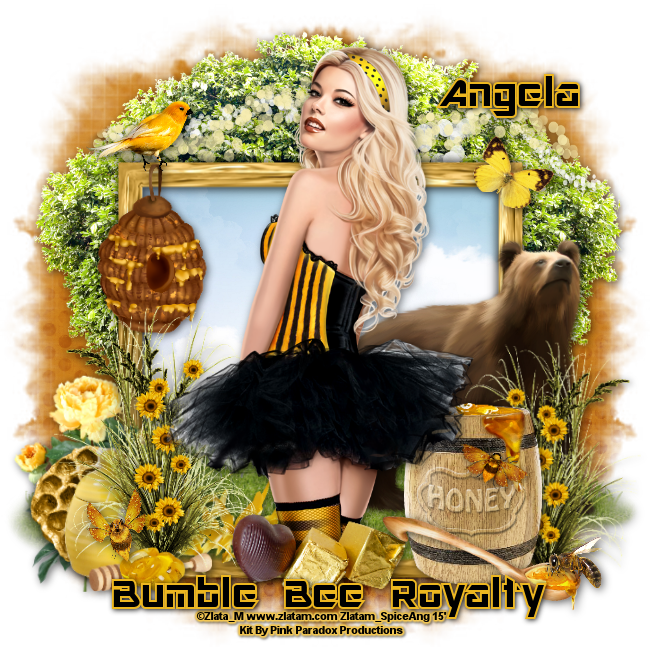
New CT Tutorial For PinkParadox Productions Using Kit **Bumble Bee Royalty**


Bumble Bee Royalty

This tutorial was written by me on April 13th, 2015. Any resemblance to any other tutorials is purely coincidental! You may not copy/paste any part of my tuts elsewhere, but you may text link to them for challenges etc!
*********
Supplies Needed:

**New CT Tag** Scrap Kit of choice, I am using a PTU Scrapkit called *Bumble Bee Royalty* By Pink Paradox Productions.

You can find this kit and many other beautiful kits here.

Tube or Image of choice, I am using a PTU Tube Called  *Just Bee* By ©Zlata_M
you can find this gorgeous tube here.

Mask of choice
I used the mask called WSL_Mask302

Text of choice
My text is called AR DESTINE Font Size 16 Bold

Program Used: Paint Shop Pro X7
****************
Let's Begin

650X650 New Image Canvas-Transparent BKgrnd

Open your tube
Copy & Paste to canvas. Resize and Position add to center of your work.

Open Bumble Bee Royalty Frames (4)
Copy & Paste to bottom layer. Resize & Position add to the center of your tube.

Open Bumble Bee Royalty (36)
Copy& Paste to layer just below tube. Resize & Position add to the left bottom corner.

Open Bumble Bee Royalty (33)
Copy & Paste to top layer. Resize & Position to the center of tube.

Open Bumble Bee Royalty (37)
Copy & Paste to top layer. Resize & Position add to the left bottom corner. Flip by pressing ctrl+M.

Open Bumble Bee Royalty (2)
Copy & Paste to layer just above frame. Resize & Position to left bottom. Flip by pressing ctrl+M.

Open Bumble Bee Royalty (13)
Copy & Paste to top layer. Resize & Position add to left bottom place so the bee look as if it is on the spoon of honey.

Open Bumble Bee Royalty (15)
Copy & Paste to top layer. Resize & Position add to the left bottom place on the honey barrel.

Open Bumble Bee Royalty (35)
Copy & Paste to layer just above frame. Resize & Position add to right top corner of frame.

Open Bumble Bee Royalty (38)
Copy & Paste to layer just below your tube. Resize & Position add to right bottom corner.

Open Bumble Bee Royalty (39)
Copy & Paste to layer just above frame. Resize & Position add to the right bottom behind (38).

Open Bumble Bee Royalty (55)
Copy & Paste to layer just above frame. Resize & Position add to right bottom behind (39). Blend in as you like.

Open Bumble Bee Royalty (80)
Copy & Paste to layer just above frame. Resize & Position add to the center bottom center. Use your eraser tool to erase the grass below frame.

Open Bumble Bee Royalty (125)
Copy & Paste to layer just above grass. Resize & Position add to the right bottom. Flip by pressing ctrl+M.

Open Bumble Bee Royalty (123)
Copy & Paste to layer above your grass. Resize & Position add to the right bottom blend it in between your tube and the other elements.

Open Bumble Bee Royalty (150)
Copy & Paste to bottom layer. Resize & Position to the cneter top.

Open Bumble Bee Royalty (7)
Copy & Paste to top layer. Resize & Position to the left top corner of frame.

Open Bumble Bee Royalty (16)
Copy & Paste to top layer. Resize & Position to the right bottom corner.

Open Bumble Bee Royalty (6)
Copy & Paste to top layer. Resize & Position to the right top corner.

Open Bumble Bee Royalty (135)
Copy & Paste to layer just above bear. Resize & Position to right bottom. ( Duplicate) with copy mirror image by pressing ctrl+B.

Open Bumble Bee Royalty (169)
Copy & Paste to layer just above tree. Resize & Position to center just above frame.

Open Bumble Bee Royalty Papers (43)
Copy & Paste to layer just below your first frame.
Resize & Position to fit in the frame.

Open Bumble Bee Royalty (20)
Copy & Paste to bottom
Resize & Position to fit your canvas.

Add mask of your choice.

*******************************
Drop shadow used in all layers was
Vertical: 2  Horizontal: 2  Opacity: 45  Blur: 13.00
To finish add any other details and your copyright.
Make sure to save your work then you are finished.
*******************************
Hope this was easy and fun to follow!
Thanks for trying my tutorial.


Friday, March 20, 2015

New CT Tutorial For PinkParadox Productions Using Kit **Spring Garden**


Spring Garden

This tutorial was written by me on March 20th, 2015. Any resemblance to any other tutorials is purely coincidental! You may not copy/paste any part of my tuts elsewhere, but you may text link to them for challenges etc!
*********
Supplies Needed:

**New CT Tag** Scrap Kit of choice, I am using a PTU Scrapkit called *Spring Garden* By Pink Paradox Productions.

You can find this kit and many other beautiful kits here.


Tube or Image of choice, I am using a PTU Tube Called  *Jane* By ©Zlata_M (Exclusive Tube)
you can find this gorgeous tube here.


Mask of choice
My mask choice WSL_Mask302

Text of choice
My text is called Daisy Regular Font Size 16 Bold

Plugin: Xero

Program Used: Paint Shop Pro X7
****************
Let's Begin

650X650 New Image Canvas-Transparent BKgrnd

Open Spring Garden Frames (10)
Copy & Paste to bottom layer. Resize & Position to the right side and rotate as I have done and arrange to where you wish.

Open Spring Garden (29)
Copy& Paste to top layer. Resize & Position to right side to bottom of your frame element.

Open your tube
Copy & Paste to canvas. Resize and Position to left side of your work. (Duplicate) move your copy down to layer just below your grass layer Spring Garden (112). Then you will need to select your earser tool and select your top tube layer and erase what you do not want to blend it into your grass. Then you will need to select your bottom tube layer and do the same. Go back and copy your tube again copy and paste to the layer just behind your frame. We are going to flip our tube by pressing ctrl+M. Then we are going to make our tube size bigger. Once you have that done we are going to select out frame. Then we are going to go over and select out magic wand tool and once we have it then we need to click inside the frame and you should see marching ants. Once you see them go up and in Selections pull down to modify then over to expand and set it to 13. Next we need to select your tube layer again them make sure you have your pointer tool again and click inside your frame. Now you will need to go to your orignal tube layer and delete it. Then we are going to add a new paper behind our tube layer. I am using Spring Garden Paper (21) but feel free to you what you like. Then we are going to go back to our tube so make sure you have it selected. Go up to Effects and go down to Plugins over to Xero then select Radiance and set as you wish. Then we are going to go back to Xero and select Porcelain and set as you wish again. Then we are going to go up to Effect - Photo Effect - Infrared Film and set at 18, 35, 0. Then over in your layer pull down and select Luminance (L).

Open Spring Garden (31)
Copy & Paste to layer just below Spring Garden (29). Resize & Position to blend in behind your bunny element.

Open Spring Garden (34)
Copy & Paste to layer just above frame layer. Resize & Position to bottom of frame to blend in with the elements already there.

Open Spring Garden (35)
Copy & Paste to top layer. Resize & Position to fit to the left side bottom of frame and blend in.

Open Spring Garden (103)
Copy & Paste to bottom layer. Resize & Position to left side of your frame.

Open Spring Garden (112)
Copy & Paste to layer just below Spring Garden (103). Resize & Position to center bottom of frame and element Spring Garden (103).

Open Spring Garden (133)
Copy & Paste to layer just above frame layer. Resize & Position to top of frame.

Open Spring Garden (150)
Copy & Paste to layer just above frame. Resize & Position to top left side and arrange to your liking.

Open Spring Garden (156)
Copy & Paste to layer just below Spring Garden (150). Resize & Position to fit over and blend into your last flower layer just above.

Open Spring Garden (158)
Copy & Paste to layer just above Spring Garden (150). Resize & Position to left side and blend in behind with your other flowers. (Duplicate) x2 and arrange as you wish if you would like to flip then just press ctrl+M.

Open Spring Garden (9)
Copy& Paste to top layer. Resize & Position to top of the elements down at the bottom of your frame. (Duplicate) you can rotate and resize if you wish and add the copy up on the right side middle of frame or as you like.

Open Spring Garden (16)
Copy & Paste to top layer. Resize & Position to right corner bottom by bunny bear element.

Open Spring Garden Papers (18)
Copy & Paste to bottom
Resize & Position to fit your canvas (Duplicate) Flip first layer Horizontal ctrl+M

Add mask of your choice.
*******************************
Drop shadow used in all layers was
Vertical: 2  Horizontal: 2  Opacity: 45  Blur: 13.00
To finish add any other details and your copyright.
Make sure to save your work then you are finished.
*******************************
Hope this was easy and fun to follow!
Thanks for trying my tutorial

Wednesday, March 18, 2015

New CT Tutorial For Ginnibug Designz Using Kit **Once Upon A Time**

Once Upon A Time

This tutorial was written by me  on March 18th, 2015. Any resemblance to any other tutorials is purely coincidental! You may not copy/paste any part of my tuts elsewhere, but you may text link to them for challenges etc!
*********
Supplies Needed:

Scrap Kit of choice, I am using a PTU  Scrapkit called *Once Upon A Time* By Ginnibug Designz

You can purchase her kits from any of these stores:

ADI: http://store.artisticdreamsimaging.net/en/466-ginnibug-designz

PFD: http://picsfordesign.com/en/catalogue/type/k/sort/date/auth/LapisGin.pix

Spazzd Art: http://spazzdart.com/store/index.php?main_page=index&cPath=5_27

S&Co: http://scrapsncompany.com/index.php?main_page=index&manufacturers_id=36

Tube or Image of choice, I am using a PTU Tube *Princess&Dragon* By ©Zlata_M can be found here:
http://picsfordesign.com/en/catalogue/id_106566_princess_amp_dragon.pix

Mask of choice

Program Used: Paint Shop Pro X7 but any PSP should work.
****************
Let's Begin

650X650 New Image Canvas-Transparent BKgrnd

Open your tube of choice
Copy & Paste  Resize & Position to center of canvas. We will work with tube later.

Open ouat32
Copy &Paste to bottom layer. Resize & Position to bottom of your tube and center layer to tube.

Open ouat29
Copy & Paste to top layer.  Resize & Position to right side to the bottom of grass on ouat32.

Open ouat56
Copy & Paste to top layer. Resize & Position to fit down in front of ouat29 then press ctrl+M to flip and blend.

Open ouat65
Copy & Paste to layer just below ouat29. Resize & Position to blend in between castle and sign then press ctrl+M to flip. (Duplicate) if you like.

Open ouat84
Copy & Paste to top layer.. Resize & Position to center bottom just in front of tube.

Open ouat78
Copy & Paste to layer just below ouat29. Resize & Position to right side and blend in to look as the element is on the sign.

Open ouat51
Copy & Paste to layer just above bottom layer. Resize & Position to left side and blend it in to look like it is up next to the castle as I have done.

Open ouat21
Copy & Paste to layer just above ouat51. Resize & Position to left side and blend in with the ouat51.

Open ouat41
Copy & Paste to layer just below ouat29. Resize & Position to right side and blend in with your elements as I have done.

Open ouat110
Copy & Paste to top layer. Resize & Position to right side and make it look as if sitting on top of the sign.

Open ouat61
Copy & Paste to layer just above ouat29. Resize & Position to upper part on either size of your work. (Duplicate) then press ctrl+B to add in same spot of the other side.

Open ouat60
Copy& Paste to bottom layer. Resize & Position to fit in upper center behind the castle.

Open ouat43
Copy & Paste to top layer. Resize & Position to left bottom corner of your grass.

Open ouatp(12)
Copy & Paste on bottom layer
Resize to fit frame layer. (Duplicate)

Then add mask of choice
Mask I used is called WSL_Mask302

Font used Sverige Script Demo Size 11 Bold 
Used for (Once Upon A Time) as well.
*******************************
Drop shadow used in all layers was
Vertical: 2  Horizontal: 2  Opacity: 45  Blur: 14.00

To finish add any other details and your copyright.
Make sure to save your work then you are finished.
*******************************
Hope this was easy and fun to follow!
Thanks for trying my tutorial

Wednesday, March 4, 2015

CT Tags For Pink Paradox Productions - Using Kit "Chocolate Mint"


*** CT for Pink Paradox Productions** *

The Gorgeous Scrap kit used is called *Chololate Mint*

This fantastic kit is super !
This beautiful kit, perfect for chocolate and coffee lovers!  It is filled with brown and different color greens.
Fun to work with! Endless fun..

This kit comes with  120 Elements, 10 Frames, and 35 Papers
You can pick it up here for  30% off for a total $1.75
http://pinkparadoxproductions.com/store/index.php?main_page=product_info&cPath=1_2&products_id=455

In tag #1 I used the art by VeryMany- Tube name: Becky
Tube can be purchased here:
http://verymanytubes.com/tubes/becky

In tag #2 I used the art by Zlata_M - Tube name: Coffee
Tube can be purchased here:
http://zlatam.com/node/213

Tuesday, March 3, 2015

CT Tags For Ginnibug Designz - Using Kit "Admiring Spring"


***CT for Ginnibug Designz***

The Gorgeous Scrap kit used is called *Admiring Spring*

Kit: Admiring Spring
 Are you ready for Spring?? I know I am!!!
This kit can help bring you into the spring season. Contains 126 elements and 20 Papers. Easter and Spring elements and papers!

Here is the links to where my kits are sold at.
PFD: http://picsfordesign.com/en/catalogue/type/k/sort/date/auth/LapisGin.pix
Spazzd Art: http://spazzdart.com/store/index.php?main_page=index&cPath=5_27
S&Co : http://scrapsncompany.com/index.php?main_page=index&manufacturers_id=36

In tag #1 I used the art by Arthur Crowe: Tube name: Lovely Babe
Tube can be purchased here:
http://arthurcrowesfactory.com/store/index.php?route=product/product&filter_name=lovely%20babe&product_id=1286

In tag #2 I used the art by Zlata_M: Tube name: Girl/Chickabiddy
Tube can be purchased here:
http://picsfordesign.com/en/catalogue/id_104838_girl_amp_chickabiddy.pix

Friday, February 27, 2015

**New CT Tags For - Whisper In The Wind Using Kit :"Sophie"


***CT for Whisper In The Wind Designs***

Kit: Sophie
Sophie, is an elegant and classy feminine kit, that I designed to be a match for the gorgeous Sophie tube by Stan Dudin. It will match the black layer. This kit has some simply stunning elements like: piano, screen, flowers, rhinestones, beaded purse, jewelry box with pearls, masks, pearls, bird cage, fan, containers, jeweled butterfly, ribbons, bows, fan, carousel horse, candles perfume, bear, cameo, bottles, key, perfume, and so much more!This kit has shades of black, silver, and varying shades of grey. It has 100 stunning elements, 4 beautiful frames, and 12 lovely papers! I hope you enjoy it!

 It is available at all of my stores!
S&CO: http://scrapsncompany.com/index.php?main_page=product_info&cPath=161&products_id=8097
PFD: http://picsfordesign.com/en/catalogue/id_116543_sophie_match_for_stan_dudin_s_sophie_tube.pix
SPAZZDART: http://spazzdart.com/store/index.php?main_page=product_info&cPath=5_50&products_id=1033
MYSTICAL SCRAPS: http://www.mysticalscraps.com/index.php?main_page=product_info&cPath=8&products_id=11681

In tag #1 I used the art by Zlata_M : Tube Name: Kamilla
Tube can be purchased here:
http://picsfordesign.com/catalogue/id_107788_kamilla.pix

In tag #2 I used the art by Arthur Crowe: Tube Name: Air Goddess
Tube can be purchased here:
http://arthurcrowesfactory.com/store/index.php?route=product/product&filter_name=air&product_id=1242

Thursday, January 8, 2015

CT Tags For Pink Paradox Productions - Using Kit "Valentine Wedding"


*** CT for Pink Paradox Productions** *

The Gorgeous Scrap kit used is called *Valentine Wedding*
A beautiful kit can be used for more than just weddings.
This fantastic kit is super !
Filled with soft pink,black, and red colored elements. Fun to work with! Endless fun..

This kit comes with  175 Elements, 15 Frames, and 50 Papers
You can pick it up here for  30% off for a total $1.93.
http://pinkparadoxproductions.com/store/index.php?main_page=product_info&cPath=1_2&products_id=417

In tag #1 I used the art by Keith Garvey
Tubes can be purchased here:
http://garv-girlspsptubes.pinnaclecart.com/index.php?p=home

In tag #2 I used the art by Zlata_M
Tube can be purchased here:
http://picsfordesign.com/catalogue/sort/date/auth/Zlata_M.pix

Wednesday, January 7, 2015

**New CT Tags For - Whisper In The Wind Using Kit :"Reyna" Made to match "Reyna" by Lysisange**


***CT for Whisper In The Wind Designs***
 
Kit: Reyna
Reyna, is a gorgeous fall/autumn scrap kit, that I have designed to be a match for the gorgeous Reyna tube by Lysisange. It will match the golden brown, dark brown, and dark lime green layers. This kit is simply stunning, with all sorts of beautiful fall elements: leaves, trees, bridge, fence, bench, swing, candles, books, basket, apples, perfume, bows, dog, bear, flowers, and so much more! It is in shades of dark lime green, fall yellow/brown, deep brown, and white.

 It is available at all of my stores!
S&CO: http://scrapsncompany.com/index.php
PFD: http://picsfordesign.com/…/id_114977_veronica_match_for_the
SPAZZD ART: http://spazzdart.com/store/index.php
TUBES4TAGGERS: http://tubes4taggers.com/index.php

In Tag #1 TUBE used is the match Reyna by Lysisange can be found here:
http://picsfordesign.com/en/catalogue/a113996.pix

In Tag #2 TUBE used is called Bell by Zlata_M can be found here:
http://picsfordesign.com/en/catalogue/id_109560_bell.pix