Pages

Monday, August 31, 2015

CT Tags For Pink Paradox Productions - Using Kit "Beautiful Tanisha"


♥CT for Pink Paradox Productions♥
The Gorgeous Scrap kit used is called ♥Beautiful Tanisha♥

This kit was designed to match the stunning "Tanisha'" by ©verymany .This fantastic kit is super !
 Fun to work with! Endless fun..

This kit comes with  165 Elements, 15 Frames, and 45 Papers
You can pick it up here for 45% off for a total $1.46
http://pinkparadoxproductions.com/store/index.php?main_page=product_info&cPath=1_2&products_id=612

In first creation ,  I used the art by ©verymany Tube name: Tanisha
Tube can be purchased here:
http://verymanytubes.com/tubes/tanisha

In second creation, I used the art by ©verymany Tube name: Tanisha
Tube can be purchased here:
http://verymanytubes.com/tubes/tanisha

Thursday, August 27, 2015

CT Tags For Pink Paradox Productions - Using Kit "Golden Autumn"


CT for Pink Paradox Productions

The Gorgeous Scrap kit used is called ♥Golden Autumn

If you love Fall this is a must have kit.This fantastic kit is super !
 Fun to work with! Endless fun..

This kit comes with  125 Elements, 11 Frames, and 30 Papers
You can pick it up here for 45% off for a total $1.38
http://pinkparadoxproductions.com/store/index.php?main_page=product_info&cPath=1_2&products_id=609

In first creation ,  I used the art by ©Arthur Crowe Tube name: Autumn Goddness BONUS
Tube can be purchased here:
http://arthurcrowesfactory.com/store/index.php?route=product/product&filter_name=Autumn%20Goddness&product_id=1545

In second creation, I used the art by ©Trinita- Tube name: Gabrielle
Tube can be purchased here:
http://picsfordesign.com/en/catalogue/id_113601_gabrielle.pix

Wednesday, August 26, 2015

New CT Tutorial For PinkParadox Productions Using Kit **Stephanie's Kit**

Stephanie's Kit

This tutorial was written by me on August 26th, 2015. Any resemblance to any other tutorials is purely coincidental! You may not copy/paste any part of my tuts elsewhere, but you may text link to them for challenges etc!
*********
Supplies Needed:

**New CT Tag** Scrap Kit of choice, I am using a PTU Scrapkit called *Stephanie's Kit* By Pink Paradox Productions.

You can find this kit and many other beautiful kits here.


Tube or Image of choice, I am using a PTU Tube Called  *Stephanie* By ©verymany
You can find this gorgeous tube here.


Mask of choice
I used the mask called  WSL_Mask302

Text of choice
My text is called Always Beside You  Size 22 Bold

Program Used: Paint Shop Pro X7
****************
Let's Begin

650X650 New Image Canvas-Transparent BKgrnd

Open your tube
Copy & Paste to canvas. Resize and Position add to center off to left side on canvas.

Open Frames (1)
Copy & Paste to bottom layer. Resize & Position add to center just off to right side off tube.

Open Element (41)
Copy& Paste to layer just below tube. Resize & Position add to right side down toward bottom behind foot of tube.

Open Element (7)
Copy & Paste to top layer. Resize and Position add to left side bottom just infront of tubes left leg. Flip, by pressing ctrl+M.

Open Element (23)
Copy & Paste to top layer. Resize & Position add to right side bottom up next to element (41). Flip, by pressing ctrl+M.

Open Element (24)
Copy & Paste to layer just below element (23). Resize & Position add to right side up next to element (23). Flip, by pressing ctrl+M.

Open Element (54)
Copy & Paste to bottom layer. Resize & Position add to left side up behind tube and dog.

Open Element (52)
Copy & Paste to layer just above element (54). Resize & Position add to left sid eup on top of element (54) as I have done. Flip, by pressing ctrl+M.

Open Element (49)
Copy & Paste to layer just above tube. Resize & Position add to left side between I love you sign and dog.

Open Element (74)
Copy & Paste to bottom layer. Resize & Position add to center bottom under everything below frames (1).

Open Element (92)
Copy & Paste to layer just above tube. Resize & Position add to right side up next to element (41) as I have done.

Open Element (98)
Copy & Paste to bottom layer. Resize & Position add to left side up toward top up behind tubes head.

Open Element (105)
Copy & Paste to top layer. Resize & Position add to left side middle as I have done.

Open Element (87)
Copy & Paste to layer just below tube. Resize & Position add to right side up by boxes and red flowers. Blend in as you like.

Open Element (56)
Copy & Paste to layer just below tube. Resize & Position add to the right side up in the wooden boxes.

Open Element (45)
Copy & Paste to layer just above frames (1). Resize & Position add toward center of frame as I have done.

Open Element (5)
Copy & Paste to top layer. Resize & Position add to left side up in tree. Flip, by pressing ctrl+M.

Open Element (2)
Copy & Paste to top layer. Resize & Position add to right side bottom up next to tube.

Open Papers (1)
Copy & Paste to bottom layer.. Resize & Position add to fit inside frames (1).

Open Close-Up of tube
Copy & Paste to layer just below frames (1). Resize & Position add to fit frame. Flip and Erase extra from tube layer. Ajust tube color and brightness to what you wish.

Open Papers (32)
Copy & Paste to bottom
Resize & Position to fit your canvas.

Add mask of your choice.
*******************************
Drop shadow used in all layers was
Vertical: 2  Horizontal: 2  Opacity: 65  Blur: 13.00
To finish add any other details and your copyright.
Make sure to save your work then you are finished.
*******************************
Hope this was easy and fun to follow!
Thanks for trying my tutorial.

Tuesday, August 25, 2015

New CT Tutorial For PinkParadox Productions Using Kit **Steam Mystique**

Steam Mystique
This tutorial was written by me on August 25th, 2015. Any resemblance to any other tutorials is purely coincidental! You may not copy/paste any part of my tuts elsewhere, but you may text link to them for challenges etc!
*********
Supplies Needed:

**New CT Tag** Scrap Kit of choice, I am using a PTU Scrapkit called *Steam Mystique* By Pink Paradox Productions.

You can find this kit and many other beautiful kits here.


Tube or Image of choice, I am using a PTU Tube Called  *Steampunk Fairy* By ©Vadis
You can find this gorgeous tube here.


Mask of choice
I used the mask called  WSL_Mask302

Text of choice
My text is called Steamcog  Caps Size 14 Bold

Program Used: Paint Shop Pro X7
****************
Let's Begin

650X650 New Image Canvas-Transparent BKgrnd

Open your tube
Copy & Paste to canvas. Resize and Position add to center off to left on canvas. Flip, by pressing ctrl+M.

Open Element  (70)
Copy & Paste to bottom layer. Resize & Position add to center up behind tube layer as I have done.

Open Element (68)
Copy& Paste to layer just below tube. Resize & Position add to right side up next to element (70). Flip, by pressing ctrl+M then rotate so it is at a angle.

Open Element (90)
Copy & Paste to layer just below tube. Resize and Position add to center up on top part of bookshelf.

Open Element (94)
Copy & Paste to layer just above element (70). Resize & Position add to right side up between bookshelf and tube.

Open Element (98)
Copy & Paste to layer just below element (68). Resize & Position add to right side up behind element (68) and element (94).

Open Element (60)
Copy & Paste to top layer. Resize & Position add to left side bottom up next to tube.

Open Element (80)
Copy & Paste to top layer. Resize & Position add to right side bottom toward center as I have done.

Open Element (19)
Copy & Paste to layer just above tube. Resize & Position add to left side bottom corner up between tube and element (60).

Open Element (57)
Copy & Paste to layer just above tube. Resize & Position add to right side bottom toward center up between phone and element (68).

Open Element (91)
Copy & Paste to layer just above element (70). Resize & Position add to left side  up behind tube. Flip, by pressing ctrl+M.

Open Element (130)
Copy & Paste to layer just above element (70). Resize & Position add to right side up on corner of bookshelf. (Duplicate) mirror image by pressing ctrl+B.

Open Element (3)
Copy & Paste to layer just below tube. Resize & Position add to right side up on couch as I have done.

Open Element (135)
Copy & Paste to bottom layer. Resize & Position add to right side up under side of bookshelf. (Duplicate) mirror image by pressing ctrl+B.

Open Element (124)
Copy & Paste to layer just above element (135). Resize & Position add to the right side up on element (135) as I have done. (Duplicate) mirror image by pressing ctrl+B.

Open Element (49)
Copy & Paste to top layer. Resize & Position add to the center down beside tubes boot.

Open Papers (44)
Copy & Paste to bottom
Resize & Position to fit your canvas.

Add mask of your choice.
*******************************
Drop shadow used in all layers was
Vertical: 2  Horizontal: 2  Opacity: 65  Blur: 13.00
To finish add any other details and your copyright.
Make sure to save your work then you are finished.
*******************************
Hope this was easy and fun to follow!
Thanks for trying my tutorial.

Monday, August 24, 2015

New CT Tutorial For PinkParadox Productions Using Kit **Sunflower Dreams**


Sunflower Dreams

This tutorial was written by me on August 24th, 2015. Any resemblance to any other tutorials is purely coincidental! You may not copy/paste any part of my tuts elsewhere, but you may text link to them for challenges etc!
*********
Supplies Needed:

**New CT Tag** Scrap Kit of choice, I am using a PTU Scrapkit called *Sunflower Dreams* By Pink Paradox Productions.

You can find this kit and many other beautiful kits here.


Tube or Image of choice, I am using a PTU Tube Called  *Sunflower* By ©Alex_Prihodko
You can find this gorgeous tube here.


Mask of choice
I used the mask called  Gemsmasks_173

Text of choice
My text is called Calendary Hands Size 18 Bold

Program Used: Paint Shop Pro X7
****************
Let's Begin

650X650 New Image Canvas-Transparent BKgrnd

Open your tube
Copy & Paste to canvas. Resize and Position add to center part of tube will be off canvas. (Duplicate)

Open Frames (2)
Copy & Paste to layer just below top copy of tube. Resize & Position add to center. Rotate, so frame is at a angle. Select top copy of tube. Select Erase Tool > Erase to fit bottom of tube inside frame. Next, select bottom copy and erase to fit in frame.

Open Element (20)
Copy& Paste to top layer. Resize & Position add to right side bottom corner of frame up next to tube.

Open Element (24)
Copy & Paste to layer just above tube. Flip, by pressing ctrl+M. Resize and Position add to right side bottom corner right behind hat.

Open Element (25)
Copy & Paste to layer just above tube. Flip, by pressing ctrl+M. Resize & Position add to right toward center up next to tube and hat as I have done.

Open Element (49)
Copy & Paste to layer just above element (24). Resize & Position add to right side bottom up between boots and hat. Flip, by pressing ctrl+M.

Open Element (73)
Copy & Paste to layer just above element (24). Resize & Position add to right side bottom up on boots. Rotate, to a angle as I have done.

Open Element (39)
Copy & Paste to top layer. Resize & Position add to left side bottom up next to tube.

Open Element (38)
Copy & Paste to layer just below element (39). Resize & Position add to center bottom blend in with the other elements.

Open Element (47)
Copy & Paste to top layer. Resize & Position add to left side bottom blend in with blueberries. Flip. by pressing ctrl+M.

Open Element (140)
Copy & Paste to layer just above frame (2). Resize & Position add to right side middle up behind boots.

Open Element (141)
Copy & Paste to layer just below frames (2). Resize & Position add to right side middle up next to element (140). (Duplicate) add your copy as you like.

Open Element (178)
Copy & Paste to top layer. Resize & Position add to right side top corner of frame. Flip, by pressing ctrl+M.

Open Element (184)
Copy & Paste to top layer. Resize & Position add to center bottom as I have done.

Open Papers (16)
Copy & Paste to bottom.Resize & Position to fit your frame (2).

Open Papers (17)
Copy & Paste to bottom
Resize & Position to fit your canvas.

Add mask of your choice.
*******************************
Drop shadow used in all layers was
Vertical: 2  Horizontal: 2  Opacity: 65  Blur: 13.00
To finish add any other details and your copyright.
Make sure to save your work then you are finished.
*******************************
Hope this was easy and fun to follow!
Thanks for trying my tutorial.


Friday, August 21, 2015

New CT Tutorial For PinkParadox Productions Using Kit **Simple School Days**


Why So Serious

This tutorial was written by me on August 21st, 2015. Any resemblance to any other tutorials is purely coincidental! You may not copy/paste any part of my tuts elsewhere, but you may text link to them for challenges etc!
*********
Supplies Needed:

**New CT Tag** Scrap Kit of choice, I am using a PTU Scrapkit called *Simple School Days* By Pink Paradox Productions.

You can find this kit and many other beautiful kits here.


Tube or Image of choice, I am using a PTU Tube Called  *Kitty Babe School* By ©Arthur Crowe
You can find this gorgeous tube here.


Mask of choice
I used the mask called  N/A

Text of choice
My text is called Gunny Rewritten Size 14 Bold

Program Used: Paint Shop Pro X7
****************
Let's Begin

650X650 New Image Canvas-Transparent BKgrnd

Open your tube
Copy & Paste to canvas. Resize and Position add to center bottom on canvas.

Open Element (4)
Copy & Paste to bottom layer. Resize & Position add to right side behind tube. Flip by pressing ctrl+M.

Open Element (15)
Copy& Paste to bottom layer. Resize & Position add to right side behind element (4).

Open Element (6)
Copy & Paste to top layer. Resize and Position add to right side bottom corner up by tube and books.

Open Element (19)
Copy & Paste to layer just below tube. Resize & Position add to left side up behind tubes legs. Flip by pressing ctrl+M.

Open Element (54)
Copy & Paste to bottom layer. Resize & Position add to left side center up behind tube. Flip by pressing ctrl+M.

Open Element (60)
Copy & Paste to layer just above element (54). Resize & Position add to left side on leg of chalkboard. Rotate so that at a angle as I have done.

Open Element (25)
Copy & Paste to layer just above element (54). Resize & Position add to left side on chalk board down in middle by shoes of tube.

Open Element (78)
Copy & Paste to bottom layer. Resize & Position add to center off to left as I have done.

Open Element (63)
Copy & Paste to bottom layer. Resize & Position add to right side up above stack of books.

Open Element (116)
Copy & Paste to top layer. Resize & Position add to center middle of your work.

Open Element (17)
Copy & Paste to layer just below element (54). Resize & Position add to center on element (78).

Open Element (22)
Copy & Paste to top layer. Resize & Position add to center up above Teacher Pet.

Open Element (54)
Copy & Paste to top layer. Resize & Position add to center bottom up against tube. Flip by pressing ctrl+M.

Open Element (74)
Copy & Paste to bottom layer. Resize & Position add to right side under chalkboard.

Open Element (143)
Copy & Paste to layer just above element (130). Resize & Position add to center  up top as I have done. (Duplicate) to make darker and easier to see.

Open Papers (13)
Copy & Paste to bottom
Resize & Position to fit your canvas.

Add mask of your choice.
*******************************
Drop shadow used in all layers was
Vertical: 2  Horizontal: 2  Opacity: 65  Blur: 13.00
To finish add any other details and your copyright.
Make sure to save your work then you are finished.
*******************************
Hope this was easy and fun to follow!
Thanks for trying my tutorial.


Thursday, August 20, 2015

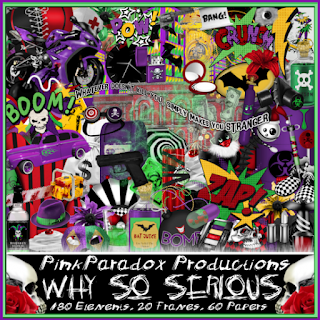
New CT Tutorial For PinkParadox Productions Using Kit **Why So Serious**


Why So Serious

This tutorial was written by me on August 20th, 2015. Any resemblance to any other tutorials is purely coincidental! You may not copy/paste any part of my tuts elsewhere, but you may text link to them for challenges etc!
*********
Supplies Needed:

**New CT Tag** Scrap Kit of choice, I am using a PTU Scrapkit called *Why So Serious* By Pink Paradox Productions.

You can find this kit and many other beautiful kits here.

Tube or Image of choice, I am using a PTU Tube Called  *Super Red* By ©Arthur Crowe
You can find this gorgeous tube here.


Mask of choice
I used the mask called  RF47Mask_asp and WSL_Mask302

Text of choice
My text is called Echinos Park Script Size 22 Bold

Program Used: Paint Shop Pro X7
****************
Let's Begin

650X650 New Image Canvas-Transparent BKgrnd

Open your tube
Copy & Paste to canvas. Resize and Position add to center of canvas.

Open Element (6)
Copy & Paste to bottom layer. Resize & Position add to center behind tube layer.

Open Element (41)
Copy& Paste to top layer. Resize & Position add to right side bottom corner on tube as I have done. Flip by pressing ctrl+M.

Open Element (36)
Copy & Paste to layer just above tube. Resize and Position add to right side bottom behind element (41).

Open Element (33)
Copy & Paste to layer just above tube. Resize & Position add to right side bottom up next to tube and elements. Blend in as I have done.

Open Element (94)
Copy & Paste to bottom layer. Resize & Position add to center behind tube.

Open Element (64)
Copy & Paste to layer just above element (94). Resize & Position add to left side up next to element (94).

Open Element (130)
Copy & Paste to bottom layer. Resize & Position add to center upper part behind your tube. Flip by pressing ctrl+M.

Open Element (82)
Copy & Paste to layer just below tube. Resize & Position add to right side up on clock and barrel.

Open Element (70)
Copy & Paste to top layer. Resize & Position add to center bottom of tube and add as you wish.

Open Element (8)
Copy & Paste to layer just above tube. Resize & Position add to left side bottom below BANG.

Open Element (58)
Copy & Paste to top layer. Resize & Position add to center bottom up against element (70).

Open Element (85)
Copy & Paste to layer just below element (6). Resize & Position add to left side center of work. (Duplicate) mirror image by pressing ctrl+B.

Open Element (118)
Copy & Paste to layer just above tube. Resize & Position add to center bottom and rotate to a angel as I have done.

Open Element (134)
Copy & Paste to layer just above element (130). Resize & Position add to center on element (130) as I have done.

Open Element (143)
Copy & Paste to layer just above element (130). Resize & Position add to center  up top as I have done. (Duplicate) to make darker and easier to see.

Open Element (192)
Copy & Paste to top layer. Resize & Position add to center across the bottom.

Open Element (118)
Copy & Paste to top layer. Resize & Position add to right side bottom corner as I have done.

Open Papers (39)
Copy & Paste to bottom
Resize & Position to fit your canvas.

Add mask of your choice.
*******************************
Drop shadow used in all layers was
Vertical: 2  Horizontal: 2  Opacity: 65  Blur: 13.00
To finish add any other details and your copyright.
Make sure to save your work then you are finished.
*******************************
Hope this was easy and fun to follow!
Thanks for trying my tutorial.


Wednesday, August 19, 2015

New CT Tutorial For PinkParadox Productions Using Kit **Autumn Daydream**

Autumn Daydream

This tutorial was written by me on August 19th, 2015. Any resemblance to any other tutorials is purely coincidental! You may not copy/paste any part of my tuts elsewhere, but you may text link to them for challenges etc!
*********
Supplies Needed:

**New CT Tag** Scrap Kit of choice, I am using a PTU Scrapkit called *Autumn Daydream* By Pink Paradox Productions.

You can find this kit and many other beautiful kits here.


Tube or Image of choice, I am using a PTU Tube Called  *Bridget* By ©verymany
You can find this gorgeous tube here.


Mask of choice
I used the mask called WSL_Mask302

Text of choice
My text is called Canela Bark Bold Size 18 Bold

Program Used: Paint Shop Pro X7
****************
Let's Begin

650X650 New Image Canvas-Transparent BKgrnd

Open your tube
Copy & Paste to canvas. Re size and Position add to center of canvas.

Open Element (3)
Copy & Paste to top layer. Re size & Position add to right side bottom up next to tube.

Open Element (90)
Copy& Paste to bottom layer. Re size & Position add to center bottom under tube and puppies.

Open Element (85)
Copy & Paste to bottom layer. Re size and Position add to center up behind tube as I have done.

Open Element (145)
Copy & Paste to layer just below tube. Re size & Position add to right side up next to bottom of element (85).

Open Element (138)
Copy & Paste to layer just above element (85). Re size & Position add to right side up next to element (85). (Duplicate) add copy to left side up behind tube and flip by pressing ctrl+M.

Open Element (142)
Copy & Paste to layer just above element (85). Re size & Position add to right side up next to element (85).

Open Element (146)
Copy & Paste to layer just above element (85). Re size & Position add to left side next to tube.

Open Element (164)
Copy & Paste to bottom layer. Re size & Position add to left side up behind tube as I have done.

Open Element (162)
Copy & Paste to layer just above element (164). Re size & Position add to right side up behind element (85)

Open Element (70)
Copy & Paste to layer just above element (85). Re size & Position add to right side up next to element (85).

Open Element (41)
Copy & Paste to top layer. Re size & Position add to left side bottom up against hand and leg of tube.

Open Element (42)
Copy & Paste to layer just below tube. Re size & Position add to right side just behind shoe of tube. Rotate is you like.

Open Element (9)
Copy & Paste to top layer. Re size & Position add to center as if standing on element (85).

Open Papers (26)
Copy & Paste to bottom
Re size & Position to fit your canvas.

Add mask of your choice.
*******************************
Drop shadow used in all layers was
Vertical: 2  Horizontal: 2  Opacity: 65  Blur: 13.00
To finish add any other details and your copyright.
Make sure to save your work then you are finished.
*******************************
Hope this was easy and fun to follow!
Thanks for trying my tutorial.


Monday, August 17, 2015

New CT Tutorial For PinkParadox Productions Using Kit **Autumn In Paris**

Autumn In Paris

This tutorial was written by me on August 17th, 2015. Any resemblance to any other tutorials is purely coincidental! You may not copy/paste any part of my tuts elsewhere, but you may text link to them for challenges etc!
*********
Supplies Needed:

**New CT Tag** Scrap Kit of choice, I am using a PTU Scrapkit called *Autumn In Paris* By Pink Paradox Productions.

You can find this kit and many other beautiful kits here.

Tube or Image of choice, I am using a PTU Tube Called  *Little Friend* By ©verymany
You can find this gorgeous tube here.


Mask of choice
I used the mask called RR_MaskSet8_2

Text of choice
My text is called Parisienne Size 14 Bold

Program Used: Paint Shop Pro X7
****************
Let's Begin

650X650 New Image Canvas-Transparent BKgrnd

Open your tube
Copy & Paste to canvas. Resize and Position add to left side on canvas. Flip your tube by pressing ctrl+M.

Open Frames (8)
Copy & Paste to Bottom layer. Resize & Position add to center on canvas then rotate so it is at a angle.

Open Element (35)
Copy& Paste to top layer. Resize & Position add to right side bottom corner of frame (8).

Open Element (76)
Copy & Paste to layer just below tube. Resize and Position add to right side upper corner on frame (8).

Open Element (108)
Copy & Paste to top layer. Resize & Position add to right side bottom corner of frame (8) up next to element (35).

Open Element (115)
Copy & Paste to layer just above frame (8). Resize & Position add to right side bottom on frame (8) and blend in.

Open Element (114)
Copy & Paste to layer just above frame (8). Resize & Position add to right side blend in behind all elements.

Open Element (159)
Copy & Paste to layer just above tube. Resize & Position add to left side bottom of tube. Duplicate. Select tube and use your eraser tool to erase tube that is below your element.

Open Element (173)
Copy & Paste to top layer. Resize & Position add to left side bottom corner as I have done.

Open Element (167)
Copy & Paste to layer just above frame (8). Resize & Position add to left side top up behind tube.

Open Element (166)
Copy & Paste to layer just above element (167). Resize & Position add to left side top and blend in with element (167).

Open Element (109)
Copy & Paste to layer just below element (108). Resize & Position add to right side bottom corner.

Open Element (40)
Copy & Paste to layer just below element (108). Resize & Position add to right side bottom then blend in as I have done.

Open Element (78)
Copy & Paste to layer just below element (114). Resize & Position add to right side bottom as I have done.

Open Element (144)
Copy & Paste to layer just below element (173). Resize & Position add to left side bottom below words. (Duplicate) arrange as you wish.

Open Element (149)
Copy & Paste to layer just below element (159). Resize & Position add to left side bottom below leaves and blend. (Duplicate)

Open Element (123)
Copy & Paste to layer just above frame (8). Resize & Position add to right side top corner of frame (8).

Open Element (127)
Copy & Paste to layer just above element (123). Resize & Position add to right side top corner on element (123)

Open Papers (22)
Copy & Paste to bottom. Resize & Position to fit your frame.

Open Papers (31) and (24)
Copy & Paste to bottom
Resize & Position to fit your canvas.

Add mask of your choice.
*******************************
Drop shadow used in all layers was
Vertical: 2  Horizontal: 2  Opacity: 65  Blur: 13.00
To finish add any other details and your copyright.
Make sure to save your work then you are finished.
*******************************
Hope this was easy and fun to follow!
Thanks for trying my tutorial.

Sunday, August 16, 2015

New CT Tutorial For PinkParadox Productions Using Kit **Beach Party**

Beach Party

This tutorial was written by me on August 16th, 2015. Any resemblance to any other tutorials is purely coincidental! You may not copy/paste any part of my tuts elsewhere, but you may text link to them for challenges etc!
*********
Supplies Needed:

**New CT Tag** Scrap Kit of choice, I am using a PTU Scrapkit called *Beach Party* By Pink Paradox Productions.

You can find this kit and many other beautiful kits here.


Tube or Image of choice, I am using a PTU Tube Called  *Daisy* By ©verymany
You can find this gorgeous tube here.


Mask of choice
I used the mask called WSL_Mask302

Text of choice
My text is called Juergen Size 20 Bold

Program Used: Paint Shop Pro X7
****************
Let's Begin

650X650 New Image Canvas-Transparent BKgrnd

Open your tube
Copy & Paste to canvas. Re size and Position add to center on canvas.

Open Element (50)
Copy & Paste to top layer. Re size & Position add to right side bottom up against the tube as I have done.

Open Element (49)
Copy& Paste to layer just above tube. Re size & Position add to right side behind element (50).

Open Element (48)
Copy & Paste to top layer. Re size and Position add to right side up in front of element (50). Flip by pressing ctrl+M.

Open Element (38)
Copy & Paste to bottom layer. Reside & Position add to right side behind all elements and blend in.

Open Element (33)
Copy & Paste to layer just above tube. Re size & Position add to left side bottom next to tube.

Open Element (32)
Copy & Paste to top layer. Re size & Position add to left side bottom next to element (33).

Open Element (34)
Copy & Paste to top layer. Re size & Position add to center bottom up against element (50).

Open Element (101)
Copy & Paste to bottom layer. Re size & Position add to center right behind tube as I have done.

Open Element (110)
Copy & Paste to bottom layer. Re size & Position add to center bottom as if everything is on it. (Duplicate) as many times as you wish and re size and flip if you wish.

Open Element (127)
Copy & Paste to bottom layer. Re size & Position add to left side top corner. (Duplicate) and re size copy and then flip by pressing ctrl+M. Then duplicate both and then mirror image them both by pressing ctrl+B.

Open Element (133)
Copy & Paste to layer just below tube. Re size & Position add to right side up in palm trees.

Open Element (139)
Copy & Paste to layer just below element (101). Re size & Position add to center behind tube up in palm trees. (Duplicate) and mirror image by pressing ctrl+B.

Open Element (138)
Copy & Paste to layer just below element (101). Re size & Position add to center behind tube up in palm trees.

Open Element (24)
Copy & Paste to top layer. Re size & Position add to right side bottom corner as I have done.

Open Element (3)
Copy & Paste to top layer. Re size & Position add to right side upper corner just above beach party sign.

Open Element (10)
Copy & Paste to top layer. Re size & Position add to center bottom up against element (50).

Open Papers (3)
Copy & Paste to bottom
Re size & Position to fit your canvas.

Add mask of your choice.
*******************************
Drop shadow used in all layers was
Vertical: 2  Horizontal: 2  Opacity: 65  Blur: 13.00
To finish add any other details and your copyright.
Make sure to save your work then you are finished.
*******************************
Hope this was easy and fun to follow!
Thanks for trying my tutorial.


Friday, August 14, 2015

New CT Tutorial For PinkParadox Productions Using Kit **London Detective**


London Detective

This tutorial was written by me on August 14th, 2015. Any resemblance to any other tutorials is purely coincidental! You may not copy/paste any part of my tuts elsewhere, but you may text link to them for challenges etc!
*********
Supplies Needed:

**New CT Tag** Scrap Kit of choice, I am using a PTU Scrapkit called *London Detective* By Pink Paradox Productions.

You can find this kit and many other beautiful kits here.

Tube or Image of choice, I am using a PTU Tube Called  *Paris* By ©misticheskaya
You can find this gorgeous tube here.
http://picsfordesign.com/en/catalogue/id_110094_paris.pix

Mask of choice
I used the mask called WSL_Mask302

Text of choice
My text is called Gill Sans MT Condensed Size 18 Bold

Program Used: Paint Shop Pro X7
****************
Let's Begin

650X650 New Image Canvas-Transparent BKgrnd

Open your tube
Copy & Paste to canvas. Re size and Position add to center bottom of canvas.

Open Element (7)
Copy & Paste to top layer. Re size & Position add to right side just in front of tube as I have done.

Open Element (23)
Copy& Paste to top layer. Re size & Position add to left side just in front of tube as I have done. Then flip by pressing ctrl+M.

Open Element (31)
Copy & Paste to bottom layer. Re size and Position add to right side up behind tubes legs.

Open Element (96)
Copy & Paste to bottom layer. Re size & Position add to left side right behind tube.

Open Element (101)
Copy & Paste to bottom layer. Re size & Position add to center toward top as I have done.

Open Element (111)
Copy & Paste to bottom layer. Re size & Position add to right side behind element (31).

Open Element (54)
Copy & Paste to layer just above tube. Re size & Position add to right side up next to dog.

Open Element (63)
Copy & Paste to top layer. Re size & Position add to right side up top above train.

Open Element (121)
Copy & Paste to bottom layer. Re size & Position add to center bottom.

Open Element (106)
Copy & Paste to bottom layer. Re size & Position add to right side up behind train. Flip by pressing ctrl+M.

Open Element (146)
Copy & Paste to layer just below tube. Re size & Position add to left side under tube and cup. Flip by pressing ctrl+M.

Open Element (151)
Copy & Paste to top layer. Re size & Position add to right side up under London.

Open Element (148)
Copy & Paste to layer just below tube. Re size & Position add to left side behind tube and in front of phone booth.

Open Element (137)
Copy & Paste to layer just above (96). Re size & Position add to center toward middle of canvas. (Duplicate) to make more visible.

Open Papers (3)
Copy & Paste to bottom
Re size & Position to fit your canvas.

Add mask of your choice.
*******************************
Drop shadow used in all layers was
Vertical: 2  Horizontal: 2  Opacity: 65  Blur: 13.00
To finish add any other details and your copyright.
Make sure to save your work then you are finished.
*******************************
Hope this was easy and fun to follow!
Thanks for trying my tutorial.


CT Tags For Pink Paradox Productions - Using Kit "Whoo Loves Fall"


CT for Pink Paradox Productions

The Gorgeous Scrap kit used is called ♥Whoo Loves Fall

If you love Fall this is a must have kit.This fantastic kit is super !
 Fun to work with! Endless fun..

This kit comes with  150 Elements, 15 Frames, and 40 Papers
You can pick it up here for  50% off for a total $1.25
http://pinkparadoxproductions.com/store/index.php?main_page=product_info&cPath=1_2&products_id=589

In first creation ,  I used the art by ©Arthur Crowe Tube name: Autumn Girl
Tube can be purchased here:
http://arthurcrowesfactory.com/store/index.php?route=product/product&filter_name=Autumn%20Girl&page=3&product_id=293

In second creation, I used the art by ©Arthur Crowe- Tube name: Sweet Fall
Tube can be purchased here:
http://arthurcrowesfactory.com/store/index.php?route=product/product&filter_name=Sweet%20Fall&product_id=873


Tuesday, August 11, 2015

New CT Tags For Fedor Using Tube **Undina**


CT TAGS FOR FEDOR OFFICIAL FAN GROUP

Tube used is by Fedor called ♥Undina

This gorgeous tube comes with + color variants fin and hair
to chose from. You can find this gorgeous tube here
PFD: http://picsfordesign.com/catalogue/id_120785_undina.pix


Monday, August 10, 2015

CT Tags For Pink Paradox Productions - Using Kit "Abandoned School"


CT for Pink Paradox Productions

The Gorgeous Scrap kit used is called ♥Abandoned School

This fantastic kit is super !
 Fun to work with! Endless fun..

This kit comes with  180 Elements, 15 Frames, and 40 Papers
You can pick it up here for  50% off for a total $1.33
http://pinkparadoxproductions.com/store/index.php?main_page=product_info&cPath=1_2&products_id=580

In first creation ,  I used the art by ©Arthur Crowe Tube name: Days In School
Tube can be purchased here:
http://arthurcrowesfactory.com/store/index.php?route=product/product&filter_name=Days%20In%20School&product_id=2023

In second creation, I used the art by ©Arthur Crowe- Tube name: School Baby Doll
Tube can be purchased here:
http://arthurcrowesfactory.com/store/index.php?route=product/product&filter_name=Days%20In%20School&product_id=2021


Friday, August 7, 2015

CT Tags For Pink Paradox Productions - Using Kit "Autumn Wine"


CT for Pink Paradox Productions

The Gorgeous Scrap kit used is called ♥Autumn Wine

This fantastic kit is super !
 Fun to work with! Endless fun.. Designed to match the
beautiful "Grape" by Verymany

This kit comes with  150 Elements, 15 Frames, and 40 Papers
You can pick it up here for  60% off for a total $1.00
http://pinkparadoxproductions.com/store/index.php?main_page=product_info&cPath=1_2&products_id=585

In first creation ,  I used the art by ©Verymany Tube name: Grape
Tube can be purchased here:
http://verymanytubes.com/tubes/grape

In second creation, I used the art by ©Verymany- Tube name: Grape
Tube can be purchased here:
http://verymanytubes.com/tubes/grape


Wednesday, August 5, 2015

CT Tags For Pink Paradox Productions - Using Kit "Autumn Cowgirl"


CT for Pink Paradox Productions

The Gorgeous Scrap kit used is called ♥Autumn Cowgirl

This fantastic kit is super !
 Fun to work with! Endless fun.. Perfect for cowboys & cowgirls!  Beautiful mix of western, country, animals & gorgeous autumn colors.

This kit comes with  180 Elements, 15 Frames, and 35 Papers
You can pick it up here for  64% off for a total $1.00
http://pinkparadoxproductions.com/store/index.php?main_page=product_info&cPath=1_2&products_id=584

In first creation ,  I used the art by © Arthur Crowe- Tube name: Lucky Cowgirl
Tube can be purchased here:
http://arthurcrowesfactory.com/store/index.php?route=product/product&filter_name=cowgirl&product_id=538

In second creation, I used the art by © Ismail Rac - Tube name: 2015 Cowgirl HD SL
Tube can be purchased here:
http://xeracx.net/store/index.php?main_page=product_info&cPath=30&products_id=2514

Sunday, August 2, 2015

New CT Tags For Fedor Using Tube **Natalie**


CT TAGS FOR FEDOR OFFICIAL FAN GROUP

Tube used is by Fedor called ♥Natalie

This gorgeous tube comes with + color variants clothing and hair
to chose from. You can find this gorgeous tube here
PFD: http://picsfordesign.com/en/catalogue/id_120552_natalie.pix