Pages

Wednesday, February 13, 2019

Floral Steampunk Kit

✿➹⁀✿ CT for Tiny Turtle Designs ✿➹⁀✿
This set was made using the gorgeous scrap kit called ♥ Floral Streampunk Kit ♥
This awesome kit can be found here with all her other stunning kits: 
A great tube match for this kit is the beautiful "Steampunk 21" tube by VeryMany It can be found Here! 
I used the art of Verymany to make this set


Thursday, February 7, 2019

Pink Coco Kit

✿➹⁀✿ CT for Tiny Turtle Designs ✿➹⁀✿
This set was made using the gorgeous scrap kit called ♥ Pink Coco Kit ♥
This awesome kit can be found here with all her other stunning kits: 
I used the art of Anna Liwanag to make this set
✿➹⁀✿✿➹⁀✿✿➹⁀✿✿➹⁀✿✿➹⁀✿✿➹⁀✿


Saturday, February 2, 2019

Enchantressity Kit

✿➹⁀✿ CT for Tiny Turtle Designs ✿➹⁀✿
This set was made using the gorgeous scrap kit called ♥ Enchantressity Kit ♥
This kit was designed to match the art of CelinArt Pinup tube called Enchantressity
This awesome kit can be found here with all her other stunning kits: 
I used the art of StellaFelice7 to make this set
✿➹⁀✿✿➹⁀✿✿➹⁀✿✿➹⁀✿✿➹⁀✿✿➹⁀✿


Jason Kit

✿➹⁀✿ CT for Tiny Turtle Designs ✿➹⁀✿
This set was made using the gorgeous scrap kit called ♥ Jason Kit ♥
This kit was designed to match the art of CelinArt Pinup tube called Jason
This awesome kit can be found here with all her other stunning kits: 
I used the art of CelinArt Pinup to make this set
✿➹⁀✿✿➹⁀✿✿➹⁀✿✿➹⁀✿✿➹⁀✿✿➹⁀✿


Tuesday, January 29, 2019

Steam Kato Kit

✿➹⁀✿ CT for Tiny Turtle Designs ✿➹⁀✿
This set was made using the gorgeous scrap kit called ♥ Steam Kato Kit♥
This kit was designed to match the art of CelinArt Pinup tube called Sweet Kato

This awesome kit can be found here with all her other stunning kits.
I used the art of CelinArt Pinupto make this set

✿➹⁀✿✿➹⁀✿✿➹⁀✿✿➹⁀✿✿➹⁀✿✿➹⁀✿

Sunday, January 27, 2019

Basket Kit

✿➹⁀✿ CT for Tiny Turtle Designs ✿➹⁀✿
This set was made using the gorgeous scrap kit called ♥ Basket Kit ♥
This awesome kit can be found here with all her other stunning kits:

I used the art of Alehandra_Vanhek to make this set
  

Sunday, January 28, 2018

Gothic Love

New Show Off

The tube used is from Arthur Crowe and can be found here.
The kit used is by Pink Paradox Production and can be found here.

Thursday, April 21, 2016

New CT Tutorial For PinkParadox Productions Using Kit ♥♥ Blazing Concert ♥♥

✿➹⁀✿ Blazing Concert ✿➹⁀✿

This tutorial was written by me on April 21st, 2016. Any resemblance to any other tutorials is purely coincidental! You may not copy/paste any part of my tuts elsewhere, but you may text link to them for challenges etc!
*********
Supplies Needed:

**New CT Tag** Scrap Kit of choice, I am using a PTU Scrapkit called ♥ Blazing Concert ♥ By Pink Paradox Productions.

You can find this kit and many other beautiful kits here.


Tube or Image of choice, I am using a PTU Tube Called  ♥ Blaze ♥ By ©Nocturne
You can find this gorgeous tube here.

Mask of choice
I used the mask called  WSL_Mask302

Text of choice
My text is called Acryle Script PersonalUse Size 28 Bold

Program Used: Paint Shop Pro X7
****************
Let's Begin

650X650 New Image Canvas-Transparent BKgrnd

Open Frames (7)
Copy & Paste to top layer. Re size and Position to the center of your canvas.

Open Tube
Copy & Paste to top layer. Re size & Position add to center bottom of frames (7).

Open Element (61)
Copy & Paste to top layer. Re size & Position add to right side upper corner of frames (7).

Open Element (72)
Copy & Paste to layer just above frames (7). Re size & Position add to center top on your frames (7).

Open Element (73)
Copy & Paste to layer just below tube. Re size & Position add to right side bottom corner of frames (7).
 
Open Element (71)
Copy & Paste to layer just below tube. Re size & Position add to right side bottom corner of frames (7). Rotate like I have done or as you wish.

Open Element (65)
Copy & Paste to layer just below tube. Re size & Position addto  right side bottom on element (71). Add as you wish.

Open Element (89)
Copy & Paste to layer just below tube. Re size & Position add to left side center up behind tube as I have done.

Open Element (86)
Copy & Paste to layer just below element (73). Re size & Position add to right side bottom just next to elements (73). Add as you wish.

Open Element (22)
Copy & Paste to layer just below tube. Re size & Position add to right side center up on element (71) and rotate just a little.

Open Element (77)
Copy & Paste to layer just below tube. Re size & Position add to right side top corner of frames (7).

Open Element (94)
Copy & Paste to layer just below tube.  Re size & Position add to right side of tube. Add where you wish.

Open Element (112)
Copy & Paste to bottom layer. Re size & Position add to center bottom so tube looks as she is sitting on element.

Open Element (164)
Copy & Paste to bottom layer. Re size & Position add to center of your canvas.

Open Papers (7)
Copy & Paste to layer just below frames (7). Re size & Position add to fit inside of frame.

Open Close-Up of Tube
Copy & Paste to layer just below frames (7). Re size & Position add to fit inside of frame. Then work with your tube.

Open Papers (40)
Copy & Paste to bottom
Resize & Position to fit your canvas.

Add mask of your choice.
*******************************
Drop shadow used in all layers was
Vertical: 2  Horizontal: 2  Opacity: 55  Blur: 13.00
To finish add any other details and your copyright.
Make sure to save your work then you are finished.
*******************************
Hope this was easy and fun to follow!
Thanks for trying my tutorial.


Tuesday, April 19, 2016

New CT Tutorial For PinkParadox Productions Using Kit ♥♥ Secretly Passionate ♥♥


✿➹⁀✿ Secretly Passionate ✿➹⁀✿

This tutorial was written by me on April 19th, 2016. Any resemblance to any other tutorials is purely coincidental! You may not copy/paste any part of my tuts elsewhere, but you may text link to them for challenges etc!
*********
Supplies Needed:

**New CT Tag** Scrap Kit of choice, I am using a PTU Scrapkit called ♥ Secretly Passionate ♥ By Pink Paradox Productions.

You can find this kit and many other beautiful kits here.

Tube or Image of choice, I am using a PTU Tube Called  ♥ Melody ♥ By ©Nocturne
You can find this gorgeous tube here.

Mask of choice
I used the mask called  WSL_Mask302 and

Text of choice
My text is called Acryle Script Personal Use Size 18 Bold

Program Used: Paint Shop Pro X7
****************
Let's Begin

650X650 New Image Canvas-Transparent BKgrnd

Open Tube
Copy & Paste to top layer. Re size & Position add to center of your canvas.

Open Element (133)
Copy & Paste to bottom layer. Re size & Position add to center behind tube layer as I have done.

Open Element (135)
Copy & Paste to layer just below tube. Re size & Position add to center and up behind tube as I have done. Add so as if your tube is on element.

Open Element (198)
Copy & Paste to bottom layer. Re size & Position add to right side upper corner. Duplicate with copy mirror image it to match on the left side.
 
Open Element (205)
Copy & Paste to layer just below element (135). Re size & Position add to center up behind your tube as I have done.

Open Element (74)
Copy & Paste to layer just below element (205). Re size & Position add right side up beside tube and rotate. Duplicate and with copy add down some from original then flip it.

Open Element (59)
Copy & Paste to layer just below tube. Re size & Position add to right side bottom center next to tube.

Open Element (58)
Copy & Paste to top layer. Re size & Position add to right side bottom just next to elements (59). Add as you wish.

Open Element (63)
Copy & Paste to layer just below element (59). Re size & Position add to right side center up next to element (59) and rotate to your liking.

Open Element (8)
Copy & Paste to layer just below tube. Re size & Position add to left side up next to tube. Flip your element if you would like it to look like mine.

Open Element (101)
Copy & Paste to layer just below tube.  Re size & Position add to left side of tube. Add where you wish and rotate to make it sit upright.

Open Element (30)
Copy & Paste to top layer. Re size & Position add to left side up next to tubes feet.

Open Element (29)
Copy & Paste to top layer. Re size & Position add to left side up next to either side of element (30). Duplicate with copy add to the other side of element (30).

Open Element (100)
Copy & Paste to layer just below element (74). Re size & Position add to either side toward the top. Duplicate and mirror image to match on other side.

Open Element (70)
Copy & Paste to top layer. Re size & Position add to left side bottom corner of work as I have done. Then flip the element as I have if you wish.

Open Papers (50)
Copy & Paste to bottom
Resize & Position to fit your canvas.

Add mask of your choice.
*******************************
Drop shadow used in all layers was
Vertical: 2  Horizontal: 2  Opacity: 55  Blur: 13.00
To finish add any other details and your copyright.
Make sure to save your work then you are finished.
*******************************
Hope this was easy and fun to follow!
Thanks for trying my tutorial.


Saturday, April 16, 2016

New CT Tutorial For PinkParadox Productions Using Kit ♥♥ Wedding Day ♥♥


 ✿➹⁀✿ Wedding Day ✿➹⁀✿

This tutorial was written by me on April 16th, 2016. Any resemblance to any other tutorials is purely coincidental! You may not copy/paste any part of my tuts elsewhere, but you may text link to them for challenges etc!
*********
Supplies Needed:

**New CT Tag** Scrap Kit of choice, I am using a PTU Scrapkit called ♥ Wedding Day ♥ By Pink Paradox Productions.

You can find this kit and many other beautiful kits here.

Tube or Image of choice, I am using a PTU Tube Called  ♥ Bride ♥ By ©Verymany
You can find this gorgeous tube here.

Mask of choice
I used the mask called  WSL_Mask302 and WSL_Mask353

Text of choice
My text is called Calendary Hands PERSONAL USE DE Size 20 Bold

Program Used: Paint Shop Pro X7
****************
Let's Begin

650X650 New Image Canvas-Transparent BKgrnd

Open Tube
Copy & Paste to top layer. Re size & Position add to center add toward the bottom of your canvas.

Open Element (76)
Copy & Paste to bottom layer. Re size & Position add to bottom center under as if tube is on element.

Open Element (77)
Copy & Paste to bottom layer. Re size & Position add to center and up behind tube as I have done. Duplicate x3 times to make water darker.

Open Element (1)
Copy & Paste to layer just below tube. Re size & Position add to left side  up behind tube and on your water elements. Flip if you wish as I have done.

Open Element (74)
Copy & Paste to layer just below tube. Re size & Position add to center up behind your tube as I have done. Duplicate to make darker if you wish.

Open Element (107)
Copy & Paste to layer just below tube. Re size & Position add left side bottom corner up behind your tube. Add where you wish.

Open Element (108)
Copy & Paste to layer just below tube. Re size & Position add to left side bottom corner up in front of element (107) blend in. Duplicate and flip copy and move just to the right of your origial copy.

Open Element (110)
Copy & Paste to layer just below tube. Re size & Position add to right side bottom just next to elements (107 and 108).

Open Element (16)
Copy & Paste to layer just below tube. Re size & Position add to right side lower corner up next to tree element (110). Flip by pressing ctrl+B and add where you wish.

Open Element (79)
Copy & Paste to bottom layer. Re size & Position add to center top just off to the left some and duplicate to make clouds darker.

Open Element (78)
Copy & Paste to bottom layer.  Re size & Position add to top right side behind your clouds. Duplicate to make the sun brighter.

Open Element (88)
Copy & Paste to layer just below tube. Re size & Position add to right side bottom up behind tube to the right side of basket element.

Open Element (111)
Copy & Paste to layer just below tube. Re size & Position add to left side right behind tube as if the tree is behind tube.

Open Element (99)
Copy & Paste to layer just below tube. Re size & Position add to left side up next to tree and flip and blend in with tree. Duplicate with copy as to the other side of the same tree and flip and blend in again.

Open Element (58)
Copy & Paste to layer just below tube. Re size & Position add to center top up behind tube as I have done.

Open Element (57)
Copy & Paste to layer just above element (110). Re size & Position add to element (110) tree right above basket.

Open Element (122)
Copy & Paste to top layer. Re size & Position add to center left side as if in front of tree layer.

Open Element (14)
Copy & Paste to top layer. Re size & Position add to center bottom up next to tube. Add like mine or where you like.

Open Element (46)
Copy & Paste to top layer. Re size & Position add to center bottom just off to the right up next to tube. Add like mine or where you like.

Open Element (36)
Copy & Paste to top layer. Re size & Position add to center bottom up on element (46) as if they are sitting on it. Add like mine or where you like.

Open Element (17)
Copy & Paste to top layer. Re size & Position add to left bottom corner up next to tube. Add like mine or where you like.

Open Element (47)
Copy & Paste to top layer. Re size & Position add to center bottom up next to glasses. Add like mine or where you like.

Open Element (22)
Copy & Paste to top layer. Re size & Position add to center bottom up next to tube. Add like mine or where you like.

Open Element (23)
Copy & Paste to top layer. Re size & Position add to center bottom up on element (46). Add like mine or where you like.

Open Element (7)
Copy & Paste to top layer. Re size & Position add to left side up by rainbow and clouds. Add where you wish.

Open Element (35)
Copy & Paste to top layer. Re size & Position add to center up by rainbow and clouds. Duplicate and with your copy flip it. Add where you wish.

Open Papers (32 bottom and 29 top)
Copy & Paste to bottom
Resize & Position to fit your canvas.

Add mask of your choice.
*******************************
Drop shadow used in all layers was
Vertical: 2  Horizontal: 2  Opacity: 55  Blur: 13.00
To finish add any other details and your copyright.
Make sure to save your work then you are finished.
*******************************
Hope this was easy and fun to follow!
Thanks for trying my tutorial.


Thursday, April 14, 2016

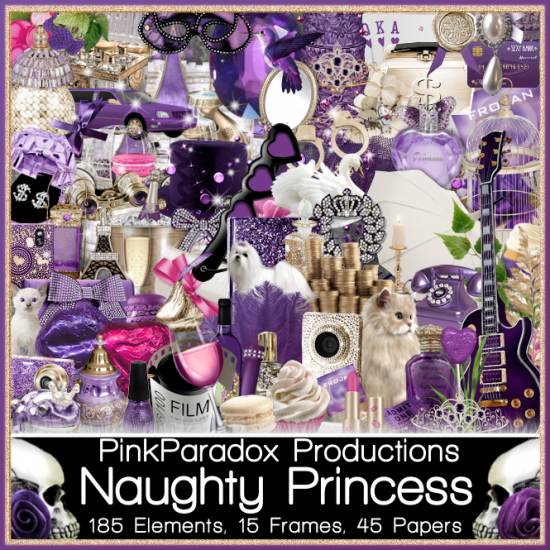
New CT Tutorial For PinkParadox Productions Using Kit ♥♥ Naughty Princess ♥♥

✿➹⁀✿ Naughty Princess ✿➹⁀✿

This tutorial was written by me on April 14th, 2016. Any resemblance to any other tutorials is purely coincidental! You may not copy/paste any part of my tuts elsewhere, but you may text link to them for challenges etc!
*********
Supplies Needed:

**New CT Tag** Scrap Kit of choice, I am using a PTU Scrapkit called ♥ Naughty Princess ♥ By Pink Paradox Productions.

You can find this kit and many other beautiful kits here.

Tube or Image of choice, I am using a PTU Tube Called  ♥ Princess ♥ By ©Verymany
You can find this gorgeous tube here.

Mask of choice
I used the mask called  WSL_Mask302

Text of choice
My text is called Amazing Bro Size 28 Bold

Program Used: Paint Shop Pro X7
****************
Let's Begin

650X650 New Image Canvas-Transparent BKgrnd

Open Frames (14)
Copy & Paste to top layer. Re size & Position add to center on your canvas.

Open Tube
Copy & Paste to top layer. Re size & Position add to center add to bottom of frames (14).

Open Element (97)
Copy & Paste to top layer. Re size & Position add to bottom center in front of tube. Use your erase tool to erase the bottom part of your tube that goes down under car element.

Open Element (70)
Copy & Paste to layer just below tube. Re size & Position add to left side bottom corner of tube.

Open Element (51)
Copy & Paste to layer just below tube. Re size & Position add to left side  bottom up next to tube layer, as I have done and blend in as you wish.

Open Element (39)
Copy & Paste to layer just above frames (14). Re size & Position add to left side bottom corner of tube layer. Add up behind coins element and rotate to blend in. Duplicate and with copy mirror image it to match other side.

Open Element (35)
Copy & Paste to top layer. Re size & Position add left side bottom corner. Add where you wish.

Open Element (16)
Copy & Paste to layer just below tube. Re size & Position add to right side bottom corner up behind tube. Add as you wish.

Open Element (17)
Copy & Paste to layer just below tube. Re size & Position add to right side bottom just next to element (16).

Open Element (20)
Copy & Paste to layer just below tube. Re size & Position add to right side lower corner up next to elements (16 and 17). Duplicate and add copy as I have or as you like.

Open Element (49)
Copy & Paste to layer just above element (116). Re size & Position add to right side bottom corner up in front of element (16). Add where you wish.

Open Element (52)
Copy & Paste to layer just above element (39). Re size & Position add to right side bottom corner up next to elements as I have done.

Open Element (82)
Copy & Paste to layer just above frames (14). Re size & Position add to right side bottom up behind element (39) and rotate if you wish.

Open Element (106)
Copy & Paste to bottom layer. Re size & Position add to center of your canvas.

Open Element (167)
Copy & Paste to top layer. Re size & Position add to left left side toward the bottom up next to tube as I have done.

Open Element (169)
Copy & Paste to top layer. Re size & Position add to left side toward the bottom up next to tube under element (167).

Open Element (177)
Copy & Paste to layer just below frames (14). Re size & Position add to top and duplicate as many times as you wish and add where you like.

Open Element (176)
Copy & Paste to layer just below elements (177). Re size & Position add to top and duplicate as many times as you wish and add where you like.

Open Element (179)
Copy & Paste to top layer. Re size & Position add to left side up by work elements. Duplicate and mirrow image the copy to match the other side.

Open Papers (12)
Copy & Paste to layer just below frame. Re size & Position to fit in frames (14)

Open Papers (49)
Copy & Paste to bottom
Resize & Position to fit your canvas.

Add mask of your choice.
*******************************
Drop shadow used in all layers was
Vertical: 2  Horizontal: 2  Opacity: 55  Blur: 13.00
To finish add any other details and your copyright.
Make sure to save your work then you are finished.
*******************************
Hope this was easy and fun to follow!
Thanks for trying my tutorial.


Wednesday, April 13, 2016

New CT Tutorial For PinkParadox Productions Using Kit **Gothic Lolita**

✿➹⁀✿ Gothic Lolita ✿➹⁀✿

This tutorial was written by me on April 13th, 2016. Any resemblance to any other tutorials is purely coincidental! You may not copy/paste any part of my tuts elsewhere, but you may text link to them for challenges etc!
*********
Supplies Needed:

**New CT Tag** Scrap Kit of choice, I am using a PTU Scrapkit called ♥ Gothic Lolita ♥ By Pink Paradox Productions.

You can find this kit and many other beautiful kits here.

Tube or Image of choice, I am using a PTU Tube Called  ♥ Magda ♥ By ©Alex_Prihodko
You can find this gorgeous tube here.

Mask of choice
I used the mask called  WSL_Mask302

Text of choice
My text is called Avalanche Script TT Size 16 Bold

Program Used: Paint Shop Pro X7
****************
Let's Begin

650X650 New Image Canvas-Transparent BKgrnd

Open Frames (24)
Copy & Paste to top layer. Re size & Position add to center just off to right some of your work area. Add down in from of tubes leg as I have done or as you wish.

Open Tube
Copy & Paste to top layer. Re size & Position add to center add to bottom of frames (24).

Open Element (91)
Copy & Paste to layer just below tube. Re size & Position add to bottom left side corner of tube as I have done. Duplicate and rotate or flip and re size copy.

Open Element (156)
Copy & Paste to bottom layer. Re size & Position add to center bottom under your tube layer.

Open Element (89)
Copy & Paste to top layer. Re size & Position add to left side  bottom up next to tube layer, as I have done and blend in as you wish.

Open Element (158)
Copy & Paste to layer just above frames (24). Re size & Position add to right side bottom corner of tube layer. Add as you wish.

Open Element (131)
Copy & Paste to layer just above frames (24). Re size & Position add to center up behind tube.

Open Element (135)
Copy & Paste to layer just above element (131). Re size & Position add to right side bottom corner up behind tube. Add as you wish.

Open Element (7)
Copy & Paste to top layer. Re size & Position add to right side up on the back of couch layer. As if  cat is laying on top of couch.

Open Element (36)
Copy & Paste to layer just below tube. Re size & Position add to left side lower corner up next to hand of tube as I have done.

Open Element (64)
Copy & Paste to layer just above element (158). Re size & Position add to left side bottom corner up next to tube. Flip as I have done or just keep as is.

Open Element (60)
Copy & Paste to layer just above element (64). Re size & Position add to left side bottom corner up next to element (64) as I have done.

Open Element (204)
Copy & Paste to top layer. Re size & Position add to center left side of tube as I have done.

Open Element (211)
Copy & Paste to top layer. Re size & Position add to center top of your frames (24).

Open Element (227)
Copy & Paste to bottom layer. Re size & Position add to left or right side then duplicate and mirror image your copy to match other side.

Open Element (221)
Copy & Paste to layer just above frames (24). Re size & Position add to center top of frames (24) as I have done.

Open Element (228)
Copy & Paste to layer just below tube. Re size & Position add to center up behind your tube.

Open Element (71)
Copy & Paste to top layer. Re size & Position add to center bottom up next to your tube like I have done.

Open Element (187)
Copy & Paste to layer just above tube. Re size & Position add to left side up behind your word element.

Open Papers (12)
Copy & Paste to bottom
Resize & Position to fit your canvas.

Add mask of your choice.
*******************************
Drop shadow used in all layers was
Vertical: 2  Horizontal: 2  Opacity: 55  Blur: 13.00
To finish add any other details and your copyright.
Make sure to save your work then you are finished.
*******************************
Hope this was easy and fun to follow!
Thanks for trying my tutorial.


Monday, April 11, 2016

New CT Tutorial For PinkParadox Productions Using Kit **Sunny Daydream**

✿➹⁀✿ Sunny Daydream ✿➹⁀✿

This tutorial was written by me on April 11th, 2016. Any resemblance to any other tutorials is purely coincidental! You may not copy/paste any part of my tuts elsewhere, but you may text link to them for challenges etc!
*********
Supplies Needed:

**New CT Tag** Scrap Kit of choice, I am using a PTU Scrapkit called ♥ Sunny Daydream ♥ By Pink Paradox Productions.

You can find this kit and many other beautiful kits here.

Tube or Image of choice, I am using a PTU Tube Called  *Furry Friend 2* By ©Verymany
You can find this gorgeous tube here.

Mask of choice
I used the mask called  WSL_Mask302

Text of choice
My text is called Magneto Size 20 Bold

Program Used: Paint Shop Pro X7
****************
Let's Begin

650X650 New Image Canvas-Transparent BKgrnd

Open Tube
Copy & Paste to top layer. Re size & Position add to center a little toward bottom.

Open Element (24)
Copy & Paste to top layer. Re size & Position add to center just off to right some of your work area. Add down in from of tubes leg as I have done or as you wish.

Open Element (23)
Copy & Paste to top layer. Re size & Position add to center just off to left of Element (24) right up against it as I have done.

Open Element (21)
Copy & Paste to top layer. Re size & Position add to center bottom up next to cup and rotate as I have if you wish too.

Open Element (31)
Copy & Paste to layer just above tube layer. Re size & Position add to center bottom up next to tube layer, as I have done and blend in as you wish.

Open Element (32)
Copy & Paste to bottom layer. Re size & Position add to right side bottom corner of tube layer. Add as you wish. Flip as I have if you like.

Open Element (35)
Copy & Paste to layer just below tube. Re size & Position add to right side bottom just in front of element (32). Blend in as you wish.

Open Element (41)
Copy & Paste to layer just below element (35). Re size & Position add to right side bottom corner up behind element (35). Add as you wish.

Open Element (49)
Copy & Paste to layer just below tube layer. Re size & Position add to left side lower corner up behind tubes foot. Add as you wish.

Open Element (54)
Copy & Paste to layer just below tube. Re size & Position add to right side lower corner up next to foot of tube as I have done. Flip as I have done if you wish.

Open Element (63)
Copy & Paste to bottom layer. Re size & Position add to center of canvas up behind tube as I have done.

Open Element (64)
Copy & Paste to layer just above element (63). Re size & Position add to left side bottom corner up next to tube layer as I have done.

Open Element (84)
Copy & Paste to bottom layer. Re size & Position add to center up behind your tube layer. Add as you wish.

Open Element (89)
Copy & Paste to layer just above element (84). Re size & Position add to center bottom as if tube is on it. Then duplicate as many times as you like and re size to fill in as you like.

Open Element (94)
Copy & Paste to layer just above your elements (89). Re size & Position add to center bottom and add to top of grass layers.

Open Element (129)
Copy & Paste to layer just below tube. Re size & Position add to center right behind tube layer and add as you wish.

Open Element (83)
Copy & Paste to layer just below tube. Re size & Position add to right side center up on fence layer as I have done.

Open Element (139)
Copy & Paste to layer just below element (63). Re size & Position add to right side center up on fence layer as I have done. Duplicate and mirror image to match on left side.

Open Element (11)
Copy & Paste to top layer. Re size & Position add to right side up by garden sign.

Open Element (6)
Copy & Paste to layer just below element (49). Re size & Position add to left side up by wagen.

Open Element (148)
Copy & Paste to top layer. Re size & Position add to top center as I have done.

Open Papers (12)
Copy & Paste to bottom
Resize & Position to fit your canvas.

Add mask of your choice.
*******************************
Drop shadow used in all layers was
Vertical: 2  Horizontal: 2  Opacity: 55  Blur: 13.00
To finish add any other details and your copyright.
Make sure to save your work then you are finished.
*******************************
Hope this was easy and fun to follow!
Thanks for trying my tutorial.


Monday, April 4, 2016

New CT Tutorial For PinkParadox Productions Using Kit **Alluring Spice**

✿➹⁀✿ Alluring Spice ✿➹⁀✿

This tutorial was written by me on April 4th, 2016. Any resemblance to any other tutorials is purely coincidental! You may not copy/paste any part of my tuts elsewhere, but you may text link to them for challenges etc!
*********
Supplies Needed:

**New CT Tag** Scrap Kit of choice, I am using a PTU Scrapkit called ♥Alluring Spice ♥ By Pink Paradox Productions.

You can find this kit and many other beautiful kits here.

Tube or Image of choice, I am using a PTU Tube Called  *Teresa* By ©Verymany
You can find this gorgeous tube here.

Mask of choice
I used the mask called  WSL_Mask302

Text of choice
My text is called Derniere Script Size 24 Bold

Program Used: Paint Shop Pro X7
****************
Let's Begin

650X650 New Image Canvas-Transparent BKgrnd

Open Frames (19)
Copy & Paste to top layer. Re size & Position add to center just off to left some of your work area. Flip frame as I have done or leave it just as it is.

Open Element (173)
Copy & Paste to bottom layer. Re size & Position add to center of your canvas as I have done.

Open Element (7)
Copy & Paste to top layer. Re size & Position add to right side bottom corner of frame (19). Add as you wish.

Open Element (10)
Copy & Paste to top layer. Re size & Position add to right side as if on camels back. Add as you like.

Open Element (9)
Copy & Paste to top layer. Re size & Position add to left side bottom corner of frames (19). Add as you wish.

Open Element (49)
Copy & Paste to layer just above frame (19). Re size & Position add to left side up behind element (9).

Open Element (50)
Copy & Paste to layer just above frame (19). Re size & Position add to right side bottom corner of frame (19). Add as you wish.

Open Element (57)
Copy & Paste to layer just above frame (19).. Re size & Position add to left side lower corner on frame (19). Flip as I have done if you like. Add as you wish.

Open Element (72)
Copy & Paste to top layer. Re size & Position add to top of your frame (19). Rotate is you wish as I have done.

Open Element (92)
Copy & Paste to layer just above frame (19). Re size & Position add to top under element (72) as I have done.

Open Element (105)
Copy & Paste to layer just below frame (19). Re size & Position add to center bottom of frame (19). Add as you wish.

Open Element (162)
Copy & Paste to layer just below frame (19). Re size & Position add to left side center of frame (19) like I have done. Duplicate with copy mirror image and then move up some.

Open Element (165)
Copy & Paste to layer just above element (92). Re size & Position add to left side upper corner of your frame (19).

Open Element (14)
Copy & Paste to top layer. Re size & Position add to left side and add where you wish. Duplicate as many times as you like.

Open Your Tube
Copy & Paste to layer just above element (92). Re size & Position add to right side of your work as I have done. Add as you wish.

Open Papers (3)
Copy & Paste to layer just below frame (19). Re size & Position to fit inside frame.

Open Papers (38)
Copy & Paste to bottom
Resize & Position to fit your canvas.

Add mask of your choice.
*******************************
Drop shadow used in all layers was
Vertical: 2  Horizontal: 2  Opacity: 55  Blur: 13.00
To finish add any other details and your copyright.
Make sure to save your work then you are finished.
*******************************
Hope this was easy and fun to follow!
Thanks for trying my tutorial.


Friday, April 1, 2016

New CT Tutorial For PinkParadox Productions Using Kit **Celestial Destiny*2**

✿➹⁀✿ Celestial Destiny*2 ✿➹⁀✿

This tutorial was written by me on April 1st, 2016. Any resemblance to any other tutorials is purely coincidental! You may not copy/paste any part of my tuts elsewhere, but you may text link to them for challenges etc!
*********
Supplies Needed:

**New CT Tag** Scrap Kit of choice, I am using a PTU Scrapkit called ♥ Celestial Destiny*2 ♥ By Pink Paradox Productions.

You can find this kit and many other beautiful kits here.

Tube or Image of choice, I am using a PTU Tube Called  *Flower Angel* By ©Verymany
You can find this gorgeous tube here.

Mask of choice
I used the mask called  WSL_Mask302

Text of choice
My text is called Dark Crystal Size 18 Bold

Program Used: Paint Shop Pro X7
****************
Let's Begin

650X650 New Image Canvas-Transparent BKgrnd

Open Frames (4)
Copy & Paste to top layer. Re size & Position add to center of your work area.

Open Element (109)
Copy & Paste to top layer. Re size & Position add to center bottom of frame (4) as I have done.

Open Element (1)
Copy & Paste to top layer. Re size & Position add to right side bottom corner of frame (4). Add as you wish.

Open Element (11)
Copy & Paste to top layer. Re size & Position add to left side top corner of frame (4). Add as you like.

Open Element (9)
Copy & Paste to top layer. Re size & Position add to left side bottom corner of frames (4). Add as you wish.

Open Element (78)
Copy & Paste to top layer. Re size & Position add to left side up next to the right of element (11). Add as you wish.

Open Element (76)
Copy & Paste to layer just above frame (4). Re size & Position add to right side top on frame (4). Add as you wish.

Open Element (68)
Copy & Paste to top layer. Re size & Position add to right side upper corner on frame (4). Add as you wish.

Open Element (64)
Copy & Paste to layer just above frame (4). Re size & Position add to right side top corner on frame (4). Add as you wish.

Open Element (63)
Copy & Paste to layer just above element (64). Re size & Position add to right side bottom of element (64) as I have or where you like.

Open Element (117)
Copy & Paste to layer just below element (9). Re size & Position add to center center of frame (4). Add as you like.

Open Element (124)
Copy & Paste to bottom layer.. Re size & Position add to center bottom of your work as I have done. Duplicate to make it darker and stick out more as I have done.

Open Element (180)
Copy & Paste to layer just above element (124). Re size & Position add to center of your frame (4). Duplicate and flip the copy.

Open Element (146)
Copy & Paste to layer just above element (109). Re size & Position add to front of wall as I have done. Duplicate and move and rotate or do as you wish.

Open Element (160)
Copy & Paste to bottom layer. Re size & Position add to left side bottom corner of frame (4). Flip image upside down then duplicate with copy mirror image it to match the other side.Add as you wish.

Open Element (165)
Copy & Paste to layer just above frame (4). Re size & Position add to top left corner of frame (4). Duplicate with copy mirror image it to match on the other side. Add where you wish.

Open Element (119)
Copy & Paste to layer just above frame (4). Re size & Position add to center bottom of frame (4). Duplicate then with your copy mirror image. Then duplicate each side once to make darker if you wish as I have done. Add where you wish.

Open Your Tube
Copy & Paste top layer. Re size & Position add to bottom of your work and add where you wish.

Open Papers (31)
Copy & Paste to bottom
Resize & Position to fit your canvas.

Add mask of your choice.
*******************************
Drop shadow used in all layers was
Vertical: 2  Horizontal: 2  Opacity: 55  Blur: 13.00
To finish add any other details and your copyright.
Make sure to save your work then you are finished.
*******************************
Hope this was easy and fun to follow!
Thanks for trying my tutorial.


Wednesday, March 30, 2016

New CT Tutorial For PinkParadox Productions Using Kit **Stay With Me**

✿➹⁀✿ Stay With Me ✿➹⁀✿

This tutorial was written by me on March 30th, 2016. Any resemblance to any other tutorials is purely coincidental! You may not copy/paste any part of my tuts elsewhere, but you may text link to them for challenges etc!
*********
Supplies Needed:

**New CT Tag** Scrap Kit of choice, I am using a PTU Scrapkit called ♥ Stay With Me ♥ By Pink Paradox Productions.

You can find this kit and many other beautiful kits here.

Tube or Image of choice, I am using a PTU Tube Called  *Cupcake 2* By ©Jose Cano
You can find this gorgeous tube here.

Mask of choice
I used the mask called  WSL_Mask302

Text of choice
My text is called Crazy Thoughts Size 30 Bold

Program Used: Paint Shop Pro X7
****************
Let's Begin

650X650 New Image Canvas-Transparent BKgrnd

Open Frames (4)
Copy & Paste to top layer. Re size & Position add to center of your work area.

Open Element (153)
Copy & Paste to top layer. Re size & Position add to center top of frame (4) as I have done.

Open Element (4)
Copy & Paste to top layer. Re size & Position add to right top of heart. Flip element if you wish as I have done.

Open Element (15)
Copy & Paste to top layer. Re size & Position add to left side bottom corner add as you like.

Open Element (22)
Copy & Paste to top layer. Re size & Position add to left side bottom corner of frames (4). Add as you wish.

Open Element (27)
Copy & Paste to top layer. Re size & Position add to left side bottom corner of frames (4). Add as you wish.

Open Element (67)
Copy & Paste to layer just above frame (4). Re size & Position add to center top on frame (4). Add as you wish.

Open Element (79)
Copy & Paste to top layer. Re size & Position add to right side top corner on frame (4). Duplicate as many times as you wish and add as you wish.

Open Element (86)
Copy & Paste to top layer. Re size & Position add to right side center on frame (4). Add as you wish.

Open Element (85)
Copy & Paste to top layer. Re size & Position add to right side center bottom of element (86). Add as you wish.

Open Element (101)
Copy & Paste to bottom layer. Re size & Position add to center bottom under frame (4). Add as you like.

Open Element (149)
Copy & Paste to layer just above element (101). Re size & Position add to right side in the center behind frame (4). Duplicate and mirror image to other side as I have done.

Open Element (151)
Copy & Paste to bottom layer. Re size & Position add to center of your frame. Duplicate and flip the copy. Then we need to select all your layers in the frame and use the erase tool to erase each in the frame.

Open Element (8)
Copy & Paste to top layer. Re size & Position add to right side bottom corner of frame (4). Add as you wish. Flip if you like as I have done.

Open Element (16)
Copy & Paste to top layer. Re size & Position add to left side bottom corner of frame (4). Add as you wish. Flip if you like as I have done.

Open Element (69)
Copy & Paste to top layer. Re size & Position add to center bottom of frame (4). Add where you wish.

Open Element (158)
Copy & Paste to layer just above frame (4). Re size & Position add to center bottom of frame (4). Add where you wish.

Open Papers (7)
Copy & Paste to layer just below frame (4). Re size & Position to fit in frame.

Open Your Tube
Copy & Paste to layer just above frame (12). Re size & Position add to left side center more to the top. Duplicate you tube and move copy to top. Then use your erase tool and erase the bottom part of your top layer tube so it looks blended in.

Open Papers (18)
Copy & Paste to bottom
Resize & Position to fit your canvas.

Add mask of your choice.
*******************************
Drop shadow used in all layers was
Vertical: 2  Horizontal: 2  Opacity: 55  Blur: 13.00
To finish add any other details and your copyright.
Make sure to save your work then you are finished.
*******************************
Hope this was easy and fun to follow!
Thanks for trying my tutorial.


Saturday, March 26, 2016

New CT Tutorial For PinkParadox Productions Using Kit **Gypsy Rose**


✿➹⁀✿ Gypsy Rose ✿➹⁀✿

This tutorial was written by me on March 26th, 2016. Any resemblance to any other tutorials is purely coincidental! You may not copy/paste any part of my tuts elsewhere, but you may text link to them for challenges etc!
*********
Supplies Needed:

**New CT Tag** Scrap Kit of choice, I am using a PTU Scrapkit called ♥Gypsy Rose♥ By Pink Paradox Productions.

You can find this kit and many other beautiful kits here.


Tube or Image of choice, I am using a PTU Tube Called  *Gipsy* By ©Verymany
You can find this gorgeous tube here.


Mask of choice
I used the mask called  WSL_Mask302

Text of choice
My text is called Comix Loud Size 10 Bold

Program Used: Paint Shop Pro X7
****************
Let's Begin

650X650 New Image Canvas-Transparent BKgrnd

Open Frames (12)
Copy & Paste to top layer. Re size & Position add to center then off to right side rotate slightly.

Open Element (139)
Copy & Paste to top layer. Re size & Position add to center bottom of frame (12) as I have done.

Open Element (23)
Copy & Paste to top layer. Re size & Position add to center bottom of your work where you wish.

Open Element (71)
Copy & Paste to bottom layer. Re size & Position add to left side of frames (12). Then select your erase tool and erase what is behind your frames (12).

Open Element (27)
Copy & Paste to top layer. Re size & Position add to right side bottom corner of frames (12). Add as you wish.

Open Element (39)
Copy & Paste to layer just above frame (12). Re size & Position add to right side bottom corner of frames (12). Add as you wish.

Open Element (32)
Copy & Paste to layer just above element (39). Re size & Position add to right side bottom corner of frames (12). Add as you wish.

Open Element (48)
Copy & Paste to top layer. Re size & Position add to left side bottom corner of work area. Add as you wish. You may flip element as I have if you like.

Open Your Tube
Copy & Paste to layer just above frame (12). Re size & Position add to left side center more to the top.

Open Close up of Tube
Copy & Paste to bottom layer. Flip your tube then place it in your frame and arrange as you wish. Then use your eraser tool to erase what is outside of frame.

Open Element (50)
Copy & Paste to layer just above frame (12). Re size & Position to left side up behind tube. Then flip if you wish as I have done.

Open Element (78)
Copy & Paste to bottom layer. Re size & Position add to right side  up behind top of frame (12).

Open Element (79)
Copy & Paste to bottom layer. Re size & Position add to center top and blend in with tube, frame, and moon as I have done.

Open Element (84)
Copy & Paste to bottom layer. Re size & Position add to center bottom and adjust to fit as you like.

Open Element (131)
Copy& Paste to layer just below frame (12). Re size & Position add to left side up behind your tube as I have done. Duplicate if you like to make darker as I have done.

Open Element (9)
Copy & Paste to top layer. Re size & Position add to right side upper corner on frame (12). Flip element if you wish like I have done.

Open Element (12)
Copy & Paste to top layer. Re size & Position add to left side of your tube as I have done. If you wish to add more feel free.

Open Element (6)
Copy & Paste to top layer. Re size & Position add to left side bottom just in front of element (48). Add as you wish.

Open Element (42)
Copy& Paste to top layer. Re size & Position add to bottom center. I have added on the coins but you made add where you wish.

Open Element (41)
Copy & Paste to top layer . Re size & Position add to right side of your last element (42).

Open Papers (33)
Copy & Paste to bottom
Resize & Position to fit your canvas.

Add mask of your choice.
*******************************
Drop shadow used in all layers was
Vertical: 2  Horizontal: 2  Opacity: 55  Blur: 13.00
To finish add any other details and your copyright.
Make sure to save your work then you are finished.
*******************************
Hope this was easy and fun to follow!
Thanks for trying my tutorial.

Wednesday, March 23, 2016

New CT Tutorial For PinkParadox Productions Using Kit **Beach Honeymoon**

✿➹⁀✿ Beach Honeymoon ✿➹⁀✿

This tutorial was written by me on March 23rd, 2016. Any resemblance to any other tutorials is purely coincidental! You may not copy/paste any part of my tuts elsewhere, but you may text link to them for challenges etc!
*********
Supplies Needed:

**New CT Tag** Scrap Kit of choice, I am using a PTU Scrapkit called ♥Beach Honeymoon♥ By Pink Paradox Productions.

You can find this kit and many other beautiful kits here.


Tube or Image of choice, I am using a PTU Tube Called  *Sharon* By ©Verymany
You can find this gorgeous tube here.


Mask of choice
I used the mask called  WSL_Mask302

Text of choice
My text is called Avalanche Script TT Size 22 Bold

Program Used: Paint Shop Pro X7
****************
Let's Begin

650X650 New Image Canvas-Transparent BKgrnd

Open Frames (16)
Copy & Paste to top layer. Re size & Position add to center on your canvas.

Open Frames (10)
Copy& Paste to top layer. Re size & Position add to center of your canvas as I have done.

Open Your Tube
Copy & Paste to top layer. Re size & Position add to center bottom of your two frames and arrange as you wish.

Open Element (14)
Copy & Paste to top layer. Re size & Position to left side bottom up next to tube.

Open Element (10)
Copy & Paste to top layer. Re size & Position add to right side corner up next to your tube.

Open Element (1)
Copy & Paste to top layer. Re size & Position add to upper left corner and add as you wish. Duplicate if you wish to have more as I do.

Open Element (23)
Copy & Paste to top layer. Re size & Position add to the left bottom corner up next to coffee cup.

Open Element (73)
Copy& Paste to layer just below tube. Re size & Position add to right side center of your frames.

Open Element (100)
Copy & Paste to layer just above frame (10). Re size & Position add to left side up behind your tube as I have done.

Open Element (109)
Copy & Paste to layer just above frame (10). Re size & Position add to center bottom so it looks as if your tube is on the element.

Open Element (50)
Copy & Paste to layer just below tube. Re size & Position add to right side up behind your tube as I have done.

Open Element (57)
Copy& Paste to layer just above tube. Re size & Position add to right side bottom up by tube. Then flip your element if you wish as I have done.

Open Element (31)
Copy & Paste to layer just above element (57) . Re size & Position add to right side bottom up on towels as I have done. Flip if you wish.

Open Element (101)
Copy & Paste to layer just above paper (7). Re size & Position add to center inside your frames and add where you like.

Open Element (160)
Copy & Paste to layer just above frame (10). Re size & Position add to right side center. Use your eraser tool and erase the two trees on the left side. Then duplicate it and mirror image your copy to add to left side. Place as you like.

Open Element (153)
Copy & Paste to layer just below your butterflies. Re size & Position add to top center on your frames as I have done.

Open Element (148)
Copy & Paste to layer just above element (160). Re size & Position add to left side middle on your frames and add as you like. Duplicate and mirror image to match on other side.

Open Element (161)
Copy & Paste to layer just below tube. Re size & Position add to right side up in front of element (50). Duplicate to make darker and stand out more.

Open Element (79)
Copy & Paste to layer just below element (73). Re size & Position add to right side up under the right corner of element (73) as I have done.

Open Element (42)
Copy & Paste to layer just below element (10). Re size & Position add to right side up by towels and dog.

Open Element (9)
Copy & Paste to layer just both frames. Re size & Position add to center right above your tube as I have done.

Open Element (163)
Copy & Paste to layer just butterflies. Re size & Position add to center top of your frames like I have done.

Open Papers (7)
Copy & Paste to just behind your frames and re size to fit inside frame. Then use your eraser tool to erase what paper is outside of frame.

Open Papers (26)
Copy & Paste to bottom
Resize & Position to fit your canvas.

Add mask of your choice.
*******************************
Drop shadow used in all layers was
Vertical: 2  Horizontal: 2  Opacity: 55  Blur: 13.00
To finish add any other details and your copyright.
Make sure to save your work then you are finished.
*******************************
Hope this was easy and fun to follow!
Thanks for trying my tutorial.

Monday, March 21, 2016

New CT Tutorial For PinkParadox Productions Using Kit **Steampunk Beauty**

✿➹⁀✿ Steampunk Beauty ✿➹⁀✿

This tutorial was written by me on March 21st, 2016. Any resemblance to any other tutorials is purely coincidental! You may not copy/paste any part of my tuts elsewhere, but you may text link to them for challenges etc!
*********
Supplies Needed:

**New CT Tag** Scrap Kit of choice, I am using a PTU Scrapkit called ♥Steampunk Beauty♥ By Pink Paradox Productions.

You can find this kit and many other beautiful kits here.

Tube or Image of choice, I am using a PTU Tube Called  *Steampunk_4* By ©Verymany
You can find this gorgeous tube here.

Mask of choice
I used the mask called  WSL_Mask302

Text of choice
My text is called Steamwreck Size 24 Bold

Program Used: Paint Shop Pro X7
****************
Let's Begin

650X650 New Image Canvas-Transparent BKgrnd

Open Element (28)
Copy & Paste to top layer. Re size & Position add to center toward the bottom.

Open Frames (5)
Copy& Paste to Bottom layer. Re size & Position add to center of your canvas as I have done.

Open Element (4)
Copy& Paste to top layer. Re size & Position add to left side corner on element (28). Add where you wish.

Open Element (13)
Copy& Paste to top layer. Re size & Position to right side bottom toward center on element (28).

Open Element (11)
Copy& Paste to layer just above element (28). Re size & Position add to right side corner bottom as I have done or place as you like.

Open Your Tube
Copy & Paste to top layer. Re size & Position add to bottom center.

Open Element (57)
Copy & Paste to layer just above element (28). Re size & Position add to the right side up behind your coffee cup and rotate if you wish as I have done.

Open Element (71)
Copy& Paste to top layer. Re size & Position add to right side on element (57).

Open Element (79)
Copy & Paste to layer just above element (28). Re size & Position add to right side bottom corner and arrange as you wish.

Open Element (78)
Copy & Paste to layer just above element (28). Re size & Position add to left side bottom corning and arrange as you wish.

Open Element (103)
Copy & Paste to bottom layer. Re size & Position add to left side toward the top of your frame. Flip your element then arrange and place as you wish.

Open Element (142)
Copy& Paste to layer just above element (28). Re size & Position add to center bottom as I have done. You will need to resize.

Open Element (21)
Copy & Paste to top layer. Re size & Position add to right side bottom corner. Add where you wish.

Open Element (38)
Copy & Paste to layer just below dog. Re size & Position add to left side and add as if behind dog .

Open Element (80)
Copy & Paste to layer just above frame. Re size & Position add to right side upper corner of frame. Duplicate and mirror image to match on the other side on frame.

Open Element (3)
Copy & Paste to top layer. Re size & Position add to right side as if on your element (79).

Open Papers (28)
Copy % Paste to just behind your frame and re size to fit inside frame.

Open Papers (17)
Copy & Paste to bottom
Resize & Position to fit your canvas.

Add mask of your choice.
*******************************
Drop shadow used in all layers was
Vertical: 2  Horizontal: 2  Opacity: 55  Blur: 13.00
To finish add any other details and your copyright.
Make sure to save your work then you are finished.
*******************************
Hope this was easy and fun to follow!
Thanks for trying my tutorial.


Friday, March 18, 2016

New CT Tutorial For PinkParadox Productions Using Kit **Heart, Mind & Soul**

✿➹⁀✿ Heart, Mind & Soul ✿➹⁀✿

This tutorial was written by me on March 18th, 2016. Any resemblance to any other tutorials is purely coincidental! You may not copy/paste any part of my tuts elsewhere, but you may text link to them for challenges etc!
*********
Supplies Needed:

**New CT Tag** Scrap Kit of choice, I am using a PTU Scrapkit called ♥Heart, Mind & Soul ♥ By Pink Paradox Productions.

You can find this kit and many other beautiful kits here.

Tube or Image of choice, I am using a PTU Tube Called  *Regina (Exclusive)* By ©Alehandra_Vanhek
You can find this gorgeous tube here.

Mask of choice
I used the mask called  WSL_Mask302

Text of choice
My text is called CoventryGarden Size 18 Bold

Program Used: Paint Shop Pro X7
****************
Let's Begin

650X650 New Image Canvas-Transparent BKgrnd

Open Element (127)
Copy & Paste to bottom layer. Re size & Position add to center toward the bottom.

Open Element (122)
Copy& Paste to top layer. Re size & Position add to center of your canvas as I have done.

Open Element (126)
Copy& Paste to top layer. Re size & Position add to right side right next to  element (122). Duplicate and mirror image to match on other side.

Open Element (13)
Copy& Paste to layer just above element (122). Re size & Position to left side up next to element (122). Place as you wish.

Open Element (102)
Copy& Paste to top layer. Re size & Position add to right side up top in corner on element (122). Duplicate and mirrow image to match on other side.

Open Your Tube
Copy & Paste to top layer. Re size & Position add to bottom center.

Open Element (4)
Copy & Paste to layer just below tube. Re size & Position add to the left side right behind tube.

Open Element (8)
Copy& Paste to top layer. Re size & Position add to tube or in front of your tube.

Open Element (42)
Copy & Paste to top layer. Re size & Position add in from of your tube and add as you wish.

Open Element (32)
Copy & Paste to layer just above element (122). Re size & Position add to right side up next to element (122). Place where you would like it.

Open Element (151)
Copy & Paste to layer just above element (122). Re size & Position add to right side up next to element (122) as I have. Then flip if you wish. Duplicate and mirror image to match on other side.

Open Element (168)
Copy& Paste to bottom layer. Re size & Position add to top then once you have as you like then use your eraser tool to erase the inside of element (122). Duplicate and mirror image to match on the other side.

Open Element (77)
Copy & Paste to top layer. Re size & Position add to left side of your tube.

Open Element (85)
Copy & Paste to layer just below tube. Re size & Position add to left side and add as if under the candle element.

Open Element (89)
Copy & Paste to layer just above tube. Re size & Position add to left side up next to tubes leg.

Open Element (134)
Copy & Paste to layer just below your first layer of your mask. Re size & Position add so that it is up in the black area where your wording is.

Open Papers (17)
Copy & Paste to bottom
Resize & Position to fit your canvas.

Add mask of your choice.
*******************************
Drop shadow used in all layers was
Vertical: 2  Horizontal: 2  Opacity: 55  Blur: 13.00
To finish add any other details and your copyright.
Make sure to save your work then you are finished.
*******************************
Hope this was easy and fun to follow!
Thanks for trying my tutorial.