Pages

Sunday, June 28, 2015

CT Tags For Ginnibug Designz - Using Kit "Happy 4th Of July"


♥CT for Ginnibug Designz♥

The Gorgeous Scrap kit used is called ♥Happy 4th Of July

Happy 4th of July
Perfect for those 4th of July tubes & Tags
Red, White & Blue Colors. Lots of cute stuff to work with.
Comes with 112 Elements & 24 Papers

You can find this gorgeous kit in these stores below.
S&Co: http://scrapsncompany.com/index.php?main_page=product_info&cPath=112_467_123&products_id=11345
PFD: http://picsfordesign.com/en/catalogue/id_119372_happy_4th_of_july.pix
Tiny Turtle Designs: http://tinyturtledesigns.com/store/index.php?main_page=product_info&cPath=8_316_317&products_id=4992
Hania's Design: http://haniadesign.com/store/index.php?main_page=product_info&cPath=50_164&products_id=4228

In 1st tag I used the art by © trinita
Tube can be purchased here:
http://picsfordesign.com/catalogue/a119329.pix

In 2nd tag I used the art by ©Alex_Prihodko
Tube can be purchased here:
http://picsfordesign.com/catalogue/id_118976_ellie.pix


Friday, June 26, 2015

New CT Tutorial For PinkParadox Productions Using Kit **Gypsy Siren**


Gypsy Siren

This tutorial was written by me on June 26th, 2015. Any resemblance to any other tutorials is purely coincidental! You may not copy/paste any part of my tuts elsewhere, but you may text link to them for challenges etc!
*********
Supplies Needed:

**New CT Tag** Scrap Kit of choice, I am using a PTU Scrapkit called *Gypsy Siren* By Pink Paradox Productions.

You can find this kit and many other beautiful kits here.


Tube or Image of choice, I am using a PTU Tube Called  *Mercedes* By ©Verymany
You can find this gorgeous tube here.

Mask of choice
I used the mask called WSL_Mask248

Text of choice
My text is called Marmellata (Jam)_demo Size 18 Bold

Program Used: Paint Shop Pro X7
****************
Let's Begin

700X450 New Image Canvas-Transparent BKgrnd

Open your tube
Copy & Paste to canvas. Resize and Position add to center on canvas.

Open Frame (8)
Copy & Paste to bottom layer. Resize & Position add to center right behind tube.

Open Papers (26)
Copy& Paste to bottom layer. Resize & Position add to fit inside frame (8).

Open Element (17)
Copy & Paste to top layer. Resize and Position add to right side bottom corner of frame (8).

Open Element (25)
Copy & Paste to layer just below frame (8). Resize & Position add to left side of tube on papers (26) as I have done.

Open Element (60)
Copy & Paste to top layer. Resize & Position add to left side bottom corner of frame (8) and flip ctrl+M.

Open Element (61)
Copy & Paste to layer just below (17). Resize & Position add to right side down behind (17).

Open Element (187)
Copy & Paste to layer just below tube. Resize & Position add to left side top corner of frame (8). Use your eraser tool to get rid of bottom.

Open Element (181)
Copy & Paste to layer just below (61). Resize & Position add to right side middle of frame (8) (Duplicate) then flip ctrl+M and resize.

Open Element (176)
Copy & Paste to layer just below (61). Resize & Position add to right side just below (61) and move up and flip ctrl+M.

Open Element (38)
Copy & Paste to layer just below (17). Resize & Position add to left side of (17) and blend in as I have done.

Open Element (40)
Copy & Paste to layer just above (38). Resize & Position add to left side of (38) blend in next to (38).

Open Element (45)
Copy & Paste to layer just above frame (8). Resize & Position add to left side bottom corner as I have done.

Open Element (36)
Copy & Paste to layer just below (40). Resize & Position add to bottom center on frame (8) blend in with the fruit.

Open Element (37)
Copy & Paste to layer just above frame (8). Resize & Position add to left side bottom corner of frame (8).

Open Element (6)
Copy & Paste to top layer. Resize & Position add to right side middle blend in with plants elements. Flip ctrl+M.

Open Element (179)
Copy & Paste to layer just above frame (07). Resize & Position add to left side behind element (172) blend in as I have done.

Open Papers (38)
Copy & Paste to bottom
Resize & Position to fit your canvas.

Add mask of your choice.
*******************************
Drop shadow used in all layers was
Vertical: 2  Horizontal: 2  Opacity: 65  Blur: 13.00
To finish add any other details and your copyright.
Make sure to save your work then you are finished.
*******************************
Hope this was easy and fun to follow!
Thanks for trying my tutorial.

Wednesday, June 24, 2015

New CT Tags For Fedor Using Tube **Lillian**


♥CT Tags for Fedor Official Fan Group♥

Tube used is by Fedor called ♥Lillian

This gorgeous tube comes with different layer
to chose from. You can find this gorgeous tube here
PFD: http://picsfordesign.com/en/catalogue/id_119556_lillian.pix


Tuesday, June 23, 2015

New CT Tutorial For PinkParadox Productions Using Kit **Summer At The Lake**


Summer At The Lake

This tutorial was written by me on June 23rd, 2015. Any resemblance to any other tutorials is purely coincidental! You may not copy/paste any part of my tuts elsewhere, but you may text link to them for challenges etc!
*********
Supplies Needed:

**New CT Tag** Scrap Kit of choice, I am using a PTU Scrapkit called *Summer At The Lake* By Pink Paradox Productions.

You can find this kit and many other beautiful kits here.


Tube or Image of choice, I am using a PTU Tube Called  *Sexy Bull* By ©Arthur Crowe
You can find this gorgeous tube here.


Mask of choice
I used the mask called gemsmasks-173

Text of choice
My text is called Comix Loud Size 8 Bold

Program Used: Paint Shop Pro X7
****************
Let's Begin

700X450 New Image Canvas-Transparent BKgrnd

Open your tube
Copy & Paste to canvas. Resize and Position add to center on canvas.

Open Frame (07)
Copy & Paste to bottom layer. Resize & Position add to center right behind tube.

Open Element (173)
Copy& Paste to layer just below tube. Resize & Position add to right side on frame (07).

Open Element (97)
Copy & Paste to top layer. Resize and Position add to left side bottom corner on frame (07).

Open Element (82)
Copy & Paste to top layer. Resize & Position add to left side in front of (97).

Open Element (86)
Copy & Paste to top layer. Resize & Position add to left side flip ctrl+M and rotate so element look as if it is propped up against (82).

Open Element (107)
Copy & Paste to layer just behind tube. Resize & Position add to right side flip ctrl+M.

Open Element (81)
Copy & Paste to top layer. Resize & Position add to right side bottom corner of frame (07).

Open Element (84)
Copy & Paste to top layer. Resize & Position add to right side bottom corner of frame (07) up next to (81) as I have done.

Open Element (83)
Copy & Paste to layer just below tube. Resize & Position add to right side bottom then blend in as I have done.

Open Element (78)
Copy & Paste to top layer. Resize & Position add to left side bottom rotate just a little.

Open Element (45)
Copy & Paste to layer just above element (82). Resize & Position add to left side bottom rotate add as if on (82).

Open Element (135)
Copy & Paste to layer just above frame (07). Resize & Position add to left side up behind (97).

Open Element (38)
Copy & Paste to top layer. Resize & Position add to left side bottom half of work.

Open Element (177)
Copy & Paste to layer just above frame (07). Resize & Position add to right side up corner of frame (07).

Open Element (172)
Copy & Paste to layer just above frame (07). Resize & Position add to left side center of frame (07).

Open Element (179)
Copy & Paste to layer just above frame (07). Resize & Position add to left side behind element (172) blend in as I have done.

Open Element (181)
Copy & Paste to top layer. Resize & Position add to just left of center on bottom as I have done.

Open Element (180)
Copy & Paste to top layer. Resize & Position add to center bottom and add as you like.

Open Element (5)
Copy & Paste to layer just above (173). Resize & Position add to right side just behind tent.

Open Element (22)
Copy & Paste to top layer. Resize & Position add to left side on top of element (172).

Open Element (17) (18) (19)
Copy & Paste to top layers. Resize & Position add where you wish.

Open Papers (14)
Copy & Paste to bottom layer. Resize & Position add to fit in frame (10).

Open Papers (25)
Copy & Paste to bottom
Resize & Position to fit your canvas.

Add mask of your choice.
*******************************
Drop shadow used in all layers was
Vertical: 2  Horizontal: 2  Opacity: 65  Blur: 13.00
To finish add any other details and your copyright.
Make sure to save your work then you are finished.
*******************************
Hope this was easy and fun to follow!
Thanks for trying my tutorial.


Monday, June 22, 2015

New CT Tutorial For Spazz Art Tube **Karen**

Karen

This tutorial was written by me on June 22nd, 2015. Any resemblance to any other tutorials is purely coincidental! You may not copy/paste any part of my tuts elsewhere, but you may text link to them for challenges etc!
*********
Supplies Needed:

Tube of Choice, I am using a PTU Tube called ♥Karen♥ By ©Spazzd Art
You can find ©Spazzd Art gorgeous work here.


Scrap Kit of choice, I am using a PTU  Scrapkit called ♥July 4th♥ By MellieBeans
You can purchase this amazing kit here.


Mask of choice

Program Used: Paint Shop Pro X7 but any PSP should work.
****************
Let's Begin

650X650 New Image Canvas-Transparent BKgrnd

Open your tube of choice
Copy & Paste to your canvas. Resize & Position to the center of canvas.

Open Large Cluster Frame
Copy & Paste to bottom layer. Resize & Position add to center just behind tube.

Open Finale Fireworks
Cope & Paste to bottom layer. Resize and Position add to center top part behind tube.

Open Firecracker
Copy & Paste to layer just below tube. Resize & Position add to left side on large cluser frame.

Open 4thOfJuly
Copy & Paste to top layer. Resize & Position add to right side upper corner.

Open Shooting Star
Copy & Paste to layer. Resize & Position add to right side right under 4thOfJuly then rotate.

Open Heart 2
Copy & Paste to layer just above firecracker. Resize & Position add to left side infront of firecracker then rotate. (Duplicate) Mirror Image ctrl+B.

Open Heart 1
Copy & Paste to layer just above Heart 2. Resize & Position add to left side infront of Heart 2 then rotate. (Duplicate) Mirror Image ctrl+B.

Open Old Glory
Copy & Paste to layer just below large cluster frame. Resize & Position add to right side then rotate as I have done.

Open Paper Star 06
Copy & Paste to layer just below large cluster frame. Resize & Position add to fit in frame.

Open Copy of Tube
Copy & Paste to layer just below large cluster frame. Resize & Position add so that the eye of tube is in right side in 1st slot. (Duplicate) Mirror image ctrl+B then move to fit in left side slot. Over in layer select Luminance (L).

Open  Paper Glitter 01 and Glitter 02
Copy & Paste on bottom layer
Resize to fit canvas

Then add mask of choice
Mask I used is called MSL_Mask302

Font used BankGothic Md BT Size 20 (Bold)
*******************************
Drop shadow used in all layers was
Vertical: 2  Horizontal: 2  Opacity: 65 Blur: 13.00
To finish add any other details and your copyright.
Make sure to save your work then you are finished.
*******************************
Hope this was easy and fun to follow!
Thanks for trying my tutorial.


New CT Tags For Fedor Using Tube **LoveStory**


♥CT Tags for Fedor Official Fan Group♥
Tube used is by Fedor called ♥LoveStory♥

This gorgeous tube comes with different layer
to chose from. You can find this gorgeous tube here
PFD: http://picsfordesign.com/en/catalogue/id_119399_lovestory.pix


Friday, June 19, 2015

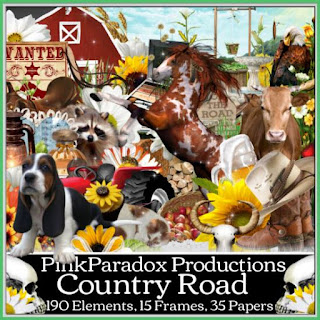
New CT Tutorial For PinkParadox Productions Using Kit **Country Road**


Country Road

This tutorial was written by me on June 19th, 2015. Any resemblance to any other tutorials is purely coincidental! You may not copy/paste any part of my tuts elsewhere, but you may text link to them for challenges etc!
*********
Supplies Needed:

**New CT Tag** Scrap Kit of choice, I am using a PTU Scrapkit called *Country Road* By Pink Paradox Productions.

You can find this kit and many other beautiful kits here.


Tube or Image of choice, I am using a PTU Tube Called  *American Girl* By ©verymany
You can find this gorgeous tube here.


Mask of choice
I used the mask called WSL_Mask302

Text of choice
My text is called Andalus Font Size 16 Bold

Program Used: Paint Shop Pro X7
****************
Let's Begin

700X450 New Image Canvas-Transparent BKgrnd

Open your tube
Copy & Paste to canvas. Resize and Position add to center on canvas.

Open Frame (10)
Copy & Paste to bottom layer. Resize & Position add to center right behind tube.

Open Element (80)
Copy& Paste to top layer. Resize & Position add to right side bottom corner of frame (10).

Open Element (38)
Copy & Paste to top layer. Resize and Position add to right side place on top of element (80).

Open Element (36)
Copy & Paste to top layer. Resize & Position add to right side up against element (80) as I have done.

Open Element (108)
Copy & Paste to layer just below element (36). Resize & Position add to right side blend in next to element (36).

Open Element (102)
Copy & Paste to layer just above frame (10). Resize & Position add to right side behind all elements and blend in.

Open Element (109)
Copy & Paste to layer just above element (103). Resize & Position add to right side bend in as I have done.

Open Element (125)
Copy & Paste to top layer. Resize & Position add to left side bottom corner of frame (10).

Open Element (7)
Copy & Paste to top layer. Resize & Position add to left side bottom.

Open Element (70)
Copy & Paste to top layer. Resize & Position add to right side add to element (102) as if it is hanging on it.

Open Element (81)
Copy & Paste to layer just above element (125). Resize & Position add to center bottom then rotate just a little.

Open Element (96)
Copy & Paste to layer just above element (109). Resize & Position add to right side blend in as I have done.

Open Element (155)
Copy & Paste to layer just below element (81). Resize & Position add to center bottom right behind element (81). (Duplicate) with copy flip ctrl+M and rotate.

Open Element (30)
Copy & Paste to top layer. Resize & Position add as you wish. (Duplicate as many time as you like.) move your copies to anywhere you like.

Open Papers (9)
Copy & Paste to bottom layer. Resize & Position add to fit in frame (10).

Open Papers (4)
Copy & Paste to bottom
Resize & Position to fit your canvas.

Add mask of your choice.
*******************************
Drop shadow used in all layers was
Vertical: 2  Horizontal: 2  Opacity: 65  Blur: 13.00
To finish add any other details and your copyright.
Make sure to save your work then you are finished.
*******************************
Hope this was easy and fun to follow!
Thanks for trying my tutorial.


Wednesday, June 17, 2015

New CT Tutorial For Ginnibug Designz Using Kit **Arrgggh!**

ARRGGGH!
This tutorial was written by me  on June 17th, 2015. Any resemblance to any other tutorials is purely coincidental! You may not copy/paste any part of my tuts elsewhere, but you may text link to them for challenges etc!
*********
Supplies Needed:

Scrap Kit of choice, I am using a PTU  Scrapkit called *ARRGGGH!* By Ginnibug Designz

You can purchase her kits from any of these stores:

ADI: http://store.artisticdreamsimaging.net/en/ginnibug-designz/7021-ginni-arrgggh-deka-kit-only-.html

Tube or Image of choice, I am using a PTU Tube *Pirate Life* By ©Arthur Crowe can be found here:
http://arthurcrowesfactory.com/store/index.php?route=product/product&filter_name=pirate&product_id=1512

Mask of choice

Program Used: Paint Shop Pro X7 but any PSP should work.
****************
Let's Begin

650X650 New Image Canvas-Transparent BKgrnd

Open your tube of choice
Copy & Paste  Resize & Position to center of canvas.

Open Ae (13)
Copy &Paste to bottom layer. Resize & Position add to right side of tube.

Open Ae (12)
Copy & Paste to layer just below tube.  Resize & Position add to left side of tube.

Open Ae (6)
Copy & Paste to layer just below tube. Resize & Position add to right side then flip ctrl+M.

Open Ae (27)
Copy & Paste to layer just below (6). Resize & Position add to left side as if on Ae (12).

Open Ae (36)
Copy & Paste to top layer. Resize & Position add to right side just infront of Ae (6).

Open Ae (17)
Copy & Paste to top layer. Resize & Position add to left side bottom corner of Ae (12).

Open Ae (34)
Copy & Paste to layer just below tube . Resize & Position add to right side just infront of Ae (36).

Open Ae (39)
Copy & Paste to bottom layer. Resize & Position add to left side behind all and blend in.

Open Ae (46)
Copy & Paste to layer just above Ae (39). Resize & Position add to left side behind in on Ae (39).

Open Ae (43)
Copy & Paste to layer just below Ae (6). Resize & Position add to right side behind Ae (6) as I have done.

Open Ae (37)
Copy & Paste to layer just below Ae (36). Resize & Position add to right side behind Ae (36)Flip by pressing ctrl+M.

Open Ae (68)
Copy & Paste to bottom layer. Resize & Position add to center bottom (Duplicate) Copy Layer flip ctrl+M.

Open Ae (24)
Copy & Paste to layer just above  Ae (12). Resize & Position add to left side bottom.

Open Ae (70)
Copy & Paste to top layer. Resize & Position add to right side bottom corner.


Open Ap (2)
Copy & Paste on bottom layer
Resize to canvas.

Then add mask of choice
Mask I used is called WSL_Mask302

Font used Runaway Lies Size 12 Bold 
*******************************
Drop shadow used in all layers was
Vertical: 2  Horizontal: 2  Opacity: 65  Blur: 13.00

To finish add any other details and your copyright.
Make sure to save your work then you are finished.
*******************************
Hope this was easy and fun to follow!
Thanks for trying my tutorial.


Tuesday, June 16, 2015

CT Tags For SpazzArt - Using Tube "Amy"


♥ CT for SpazzArt♥

This gorgeous tube is:♥Amy
 Amy, comes in blonde or brunette
and multi dress colors.

Tube can be found here:
http://spazzdart.com/store/index.php?main_page=product_info&cPath=1_2&products_id=1169

For 1st Tag I used Kit: Shabby Chic  By: Amy Marie

Kit can be purchased here:
http://amymarieskits.com/store/index.php?main_page=product_info&cPath=45&products_id=774

For 2nd Tag I used Kit: Vintage  By: Amy Marie

Kit can be purchased here:
http://amymarieskits.com/store/index.php?main_page=product_info&cPath=45&products_id=130


Sunday, June 14, 2015

CT Tags For Pink Paradox Productions - Using Kit "Lonesome Shores"

♥ CT for Pink Paradox Productions♥

The Gorgeous Scrap kit used is called ♥Lonesome Shores

This fantastic kit is super !
 Fun to work with! Endless fun..

This kit comes with  140 Elements, 10 Frames, and 30 Papers
You can pick it up here for  35% off for a total $1.63
http://pinkparadoxproductions.com/store/index.php?main_page=product_info&cPath=1_2&products_id=521

In first creation ,  I used the art by © Alex_Prihodko - Tube name: Blossom Fairy
Tube can be purchased here:
http://picsfordesign.com/en/catalogue/id_118100_blossom_fairy.pix

In second creation, I used the art by © Alex_Prihodko - Tube name: Betty
Tube can be purchased here:
http://picsfordesign.com/en/catalogue/id_112285_betty.pix


Saturday, June 13, 2015

New CT Tutorial For PinkParadox Productions Using Kit **Beach Fireworks**


Beach Fireworks

This tutorial was written by me on June 13th, 2015. Any resemblance to any other tutorials is purely coincidental! You may not copy/paste any part of my tuts elsewhere, but you may text link to them for challenges etc!
*********
Supplies Needed:

**New CT Tag** Scrap Kit of choice, I am using a PTU Scrapkit called *Beach Fireworks* By Pink Paradox Productions.

You can find this kit and many other beautiful kits here.


Tube or Image of choice, I am using a PTU Tube Called  *2014 July Calendar* By ©Arthur Crowe
You can find this gorgeous tube here.

Mask of choice
I used the mask called N/A

Text of choice
My text is called Gabriel Weiss' Friends Font Size 13 Bold

Program Used: Paint Shop Pro X7
****************
Let's Begin

700X450 New Image Canvas-Transparent BKgrnd

Open your tube
Copy & Paste to canvas. Resize and Position add to lower center on canvas.

Open Element (13)
Copy & Paste to bottom layer. Resize & Position add to right side just behind tubes hands.

Open Element (14)
Copy& Paste to layer just above (13). Resize & Position add to right corner of (13) then flip by pressing ctrl+M.

Open Element (11)
Copy & Paste to bottom layer. Resize and Position add behind (13) to the right side corner of (13) then rotate just a little.

Open Element (27)
Copy & Paste to layer just above (13). Resize & Position add to right side corner of (13) and blend in as I have done.

Open Element (34)
Copy & Paste to bottom layer. Resize & Position add to left side behind tube as I have done.

Open Element (40)
Copy & Paste to layer just above (34). Resize & Position add to bottom left of (34).

Open Element (146)
Copy & Paste to bottom layer. Resize & Position add below tube as if tube is laying in the sand. (Duplicate) mirror image ctrl+B then flip vertical ctrl+I.

Open Element (147)
Copy & Paste to bottom layer. Resize & Position add behind tube up above as I have done.

Open Element (33)
Copy & Paste to layer just above (40). Resize & Position add just in front of (40).

Open Element (32)
Copy & Paste to layer just above (33). Resize & Position add right next to (33) left side.

Open Element (1)
Copy & Paste to top layer. Resize & Position add up against tube where you like.

Open Element (65)
Copy & Paste to top layer. Resize & Position add to top of (13).

Open Element (67)
Copy & Paste to top layer. Resize & Position add up next to left side of (1).

Open Element (70)
Copy & Paste to layer just below (14). Resize & Position add up against (13).

Open Element (108)
Copy & Paste to top layer. Resize & Position add to right top corner.

Open Element (205)
Copy & Paste to layer just below (40). Resize & Position add just behind tube so you see it behind her.

Open Element (220)
Copy & Paste to layer just above (147). Resize & Position add just behind (108).

Open Element (131)
Copy & Paste to layer just above (147). Resize & Position add to left side as if it is behind grill.

Open Papers (49)
Copy & Paste to bottom
Resize & Position to fit your canvas.

Add mask of your choice. (No mask used in this creation.)

Then add a frame of your choice. I made mine from scratch.

*******************************
Drop shadow used in all layers was
Vertical: 2  Horizontal: 2  Opacity: 65  Blur: 13.00
To finish add any other details and your copyright.
Make sure to save your work then you are finished.
*******************************
Hope this was easy and fun to follow!
Thanks for trying my tutorial.


Friday, June 12, 2015

New CT Tutorial For PinkParadox Productions Using Kit **Tropical Punch**


Tropical Punch

This tutorial was written by me on June 12th, 2015. Any resemblance to any other tutorials is purely coincidental! You may not copy/paste any part of my tuts elsewhere, but you may text link to them for challenges etc!
*********
Supplies Needed:

**New CT Tag** Scrap Kit of choice, I am using a PTU Scrapkit called *Tropical Punch* By Pink Paradox Productions.

You can find this kit and many other beautiful kits here.


Tube or Image of choice, I am using a PTU Tube Called  *Sexy Hula Hula* By ©Arthur Crowe
You can find this gorgeous tube here.


Mask of choice
I used the mask called WSL_Mask302

Text of choice
My text is called Things We Said Size 12Bold

Program Used: Paint Shop Pro X7
****************
Let's Begin

650X650 New Image Canvas-Transparent BKgrnd

Open your tube
Copy & Paste to canvas. Resize and Position add to left side center of canvas.

Open Frame (4)
Copy & Paste to bottom layer. Resize & Position add to right side of tube rotate it just a little.

Open Element (89)
Copy& Paste to bottom layer. Resize & Position add to left side just behind tube.

Open Element (104)
Copy & Paste to bottom layer. Resize and Position add to right side bottom. (Duplicate) mirror image. Then (Duplicate) both and flip vertical by pressing ctrl+I.

Open Element (22)
Copy & Paste to layer just above tube. Resize & Position add to left side as if by her leg.

Open Element (21)
Copy & Paste to layer just above (22). Resize & Position add up next to (22).

Open Element (20)
Copy & Paste to layer just above (21). Resize & Position add up by hat (21). Flip by pressing ctrl+M.

Open Element (64)
Copy & Paste to layer just above frame(4). Resize & Position add to right side and rotate.

Open Element (61)
Copy & Paste to layer just above (64). Resize & Position add to middle front of (64)

Open Element (106)
Copy & Paste to layer just above frame (4). Resize & Position add to bottom center just as I have done.

Open Element (168)
Copy & Paste to layer just above frame (4). Resize & Position add to just behind (64).

Open Element (59)
Copy & Paste to top layer. Resize & Position add to front of hat layer.

Open Element (100)
Copy & Paste to layer just above (168). Resize & Position add just behind (64)

Open Element (14)
Copy & Paste to top layer. Resize & Position add to top of beach sign layer.

Open Element (2)
Copy & Paste to layer just above tube. Resize & Position add as if right next to tube.

Open Element (19)
Copy & Paste to top layer. Resize & Position add to sand layer in blank spot as I have done.

Open Element (164)
Copy & Paste to layer just above (64). Resize & Position add between beachball and surf boards.

Open Papers (52)
Copy & Paste to bottom. Resize to fit in your frame (4).

Open Close-Up of tube
Copy & Paste to layer just above papers (52). Resize to fit in frame (4). Then lighten or adjust tube to your liking.

Open Papers (51)
Copy & Paste to bottom
Resize & Position to fit your canvas.

Add mask of your choice.

*******************************
Drop shadow used in all layers was
Vertical: 2  Horizontal: 2  Opacity: 65  Blur: 13.00
To finish add any other details and your copyright.
Make sure to save your work then you are finished.
*******************************
Hope this was easy and fun to follow!
Thanks for trying my tutorial.


Thursday, June 11, 2015

New CT Tags For Fedor Using Tube **Brianna**


♥CT Tags for Fedor Official Fan Group♥
 
Tube used is by Fedor called ♥Brianna

This gorgeous tube comes with different layer
to chose from. You can find this gorgeous tube here
PFD: http://picsfordesign.com/en/catalogue/id_119235_brianna.pix


Wednesday, June 10, 2015

New CT Tutorial For PinkParadox Productions Using Kit **Summer Rose**


Summer Rose

This tutorial was written by me on June 10th, 2015. Any resemblance to any other tutorials is purely coincidental! You may not copy/paste any part of my tuts elsewhere, but you may text link to them for challenges etc!
*********
Supplies Needed:

**New CT Tag** Scrap Kit of choice, I am using a PTU Scrapkit called *Summer Rose* By Pink Paradox Productions.

You can find this kit and many other beautiful kits here.


Tube or Image of choice, I am using a PTU Tube Called  *Allissia* By ©Lysisange
You can find this gorgeous tube here.


Mask of choice
I used the mask called WSL_Mask302

Text of choice
My text is called Wizard Of The Moon Size 16 Bold

Program Used: Paint Shop Pro X7
****************
Let's Begin

650X650 New Image Canvas-Transparent BKgrnd

Open your tube
Copy & Paste to canvas. Resize and Position add to center of canvas.

Open Element (110)
Copy & Paste to Bottom layer. Resize & Position add to bottom center of your work area.

Open Element (107)
Copy& Paste to top layer. Resize & Position add to bottom center just in front of tube.

Open Element (80)
Copy & Paste to layer just below tube. Resize and Position add to left side of your tube.

Open Element (147)
Copy & Paste to layer just above (110). Resize & Position add to right side top of element (110) blend in. (Duplicate) mirror image by pressing ctrl+B.

Open Element (171)
Copy & Paste to bottom layer. Resize & Position add to upper right side and blend in with top elements as I have done. (Duplicate) mirror image by pressing ctrl+B.

Open Element (168)
Copy & Paste to top layer. Resize & Position add to right bottom corner. (Duplicate) move copy over right next to original then flip by pressing ctrl+M.

Open Element (150)
Copy & Paste to layer just above element (107). Resize & Position add to left bottom corner just behind (168) and bend then flip by pressing ctrl+M.

Open Element (91)
Copy & Paste to layer just above element (110). Resize & Position add to right side then blend in with your tree element.

Open Element (3)
Copy & Paste to top layer. Resize & Position add to bottom center then flip by pressing ctrl+M.

Open Element (7)
Copy & Paste to top layer. Resize & Position add to top left on canvas element.

Open Element (145)
Copy & Paste to layer just below element (3). Resize & Position add to back of element (3). (Duplicate) move copy right beside first copy and then flip by pressing ctrl+M.

Open Element (105)
Copy & Paste to layer just above element (121). Resize & Position add to back of tube.

Open Element (169)
Copy & Paste to layer just above element (171). Resize & Position add to left side just behind canvas element as I have done.

Open Papers
Copy & Paste to bottom
Resize & Position to fit your canvas.

Add mask of your choice.

*******************************
Drop shadow used in all layers was
Vertical: 2  Horizontal: 2  Opacity: 65  Blur: 13.00
To finish add any other details and your copyright.
Make sure to save your work then you are finished.
*******************************
Hope this was easy and fun to follow!
Thanks for trying my tutorial.


Tuesday, June 9, 2015

New CT Tutorial For Fedor Using Tube **Gabriella**


Gabriella

This tutorial was written by me on June 9th, 2015. Any resemblance to any other tutorials is purely coincidental! You may not copy/paste any part of my tuts elsewhere, but you may text link to them for challenges etc!
*********
Supplies Needed:

Tube of Choice, I am using a PTU Tube called ♥Gabriella♥ By: ©Fedor ♥
You can find  this gorgeous tube by ©Fedor here.

Scrap Kit of choice, I am using a PTU Scrapkit called *Summer Breeze* By Amy Marie♥
You can her amazing kit here.

Mask of choice

Program Used: Paint Shop Pro X7 but any PSP should work.
****************
Let's Begin

650X650 New Image Canvas-Transparent BKgrnd

Open your tube of choice
Copy & Paste to your canvas. Resize & Position to the left side down some on canvas.

Open Element (51)
Copy & Paste to bottom layer. Resize & Position add to right of tube.

Open Element (24)
Cope & Paste to layer just below tube.  Resize and Position add to bottom of tube so it as if she is sitting on the sand.

Open Element (70)
Copy & Paste to layer just below tube. Resize & Position add to the right side of your tube on the sand as I have done.

Open Element (67)
Copy & Paste to layer just below Element (70). Resize & Position add to right side just behind element (70).

Open Element (76)
Copy & Paste to layer just below tube. Resize & Position add to right side and blend in with your other elements as I have done.

Open Element (68)
Copy & Paste to layer just above element (51). Resize & Position add to right of your work as I have done. Flip by pressing ctrl+M.

Open Element (130)
Copy & Paste to layer just above Element (51). Resize & Position add to left side of tube.

Open Element (86)
Copy & Paste to layer just above element (130). Resize & Position add to top shelf of boat.

Open Paper (95)
Copy & Paste to layer just above element (86). Resize & Position add to middle shelf of boat.

Open Element (94)
Copy & Paste to layer just above (95). Resize & Position add to bottom shelf of boat.

Open Element (2)
Copy & Paste to top layer. Resize & Position add to up around your tree. (Duplicate) and add copy where you wish.

Open Element (103)
Copy & Paste to top layer. Resize & Position add to bottom up against tube layer.

Open Element (21)
Copy & Paste to top layer. Resize & Position add to bottom up against tube layer and blend in with element (103).

Open  Papers (18)
Copy & Paste on bottom layer
Resize to fit canvas

Then add mask of choice
Mask I used is called WSL_Mask302

Font used Calendary Hands PERSONAL USE DE Size 16 (Bold)
*******************************
Drop shadow used in all layers was
Vertical: 2  Horizontal: 2  Opacity: 65  Blur: 13.00
To finish add any other details and your copyright.
Make sure to save your work then you are finished.
*******************************
Hope this was easy and fun to follow!
Thanks for trying my tutorial.


Monday, June 8, 2015

New CT Tutorial For Ginnibug Designz Using Kit **Grizzly Bear**


Grizzly Bear

This tutorial was written by me  on June 8th, 2015. Any resemblance to any other tutorials is purely coincidental! You may not copy/paste any part of my tuts elsewhere, but you may text link to them for challenges etc!
*********
Supplies Needed:

Scrap Kit of choice, I am using a PTU  Scrapkit called *Grizzly Bear* By Ginnibug Designz

You can purchase her kits from here.

S&Co: http://scrapsncompany.com/index.php?main_page=index&manufacturers_id=36

Tube or Image of choice, I am using a PTU Tube *Sexy Army* By ©The Hunter can be found here:
http://scrapsncompany.com/index.php?main_page=product_info&cPath=113_134_163&products_id=3659

Mask of choice

Program Used: Paint Shop Pro X7 but any PSP should work.
****************
Let's Begin

650X650 New Image Canvas-Transparent BKgrnd

Open your tube of choice
Copy & Paste  Resize & Position to center of canvas.

Open Gbe 54
Copy &Paste to bottom layer. Resize & Position add to center behind tube.

Open Gbe 60
Copy & Paste to top layer.  Resize & Position add to bottom left corner on Gbe 54.

Open Gbe 59
Copy & Paste to top layer. Resize & Position add to bottom right corner on Gbe 54.

Open Gbe 65
Copy & Paste to bottom layer. Resize & Position add to bottom of your work and add to left half duplicate and mirror image by pressing ctrl+B.

Open Gbe 79
Copy & Paste to layer just above tube. Resize & Position add to right side of your work.

Open Gbe 12
Copy & Paste to layer just above Gbe 79. Resize & Position add to bottom right side corner and blend in as I have done.

Open Gbe 31
Copy & Paste to layer just above . Resize & Poissition add to bottom right side and add up against Gbe 12.

Open Gbe 10
Copy & Paste to top layer. Resize & Position add to bottom center of your work.

Open Gbe 3
Copy & Paste to layer just below Gbe 10. Resize & Position add to left side of Gbe 10 then flip by pressing ctrl+M.

Open Gbe 17
Copy & Paste to layer just below Gbe 3. Resize & Position add to left of Gbe 3.

Open Gbe 9
Copy & Paste to layer just below Gbe 17. Resize & Position add to right side behind cups. Flip by pressing ctrl+M.

Open Gbe 62
Copy & Paste to layer just above Gbe 54. Resize & Position add to left side on frame.

Open Gbe 63
Copy & Paste to layer just above  Gbe 62. Resize & Position add to left side just in front of Gbe 62. Resize and add as I have done.

Open Gbe 47
Copy & Paste to layer just below Gbe 60. Resize & Position add to left side up against jeep.

Open Gbe 51
Copy & Paste to layer just above Gbe 54. Resize & Position add to right upper corner of your frame.

Open Gbp 7
Copy & Paste to layer just below Gbe 54. Resize & Position to fit inside frame.

Open Gbp 10
Copy & Paste on bottom layer
Resize to fit frame layer. (Duplicate)

Then add mask of choice
Mask I used is called WSL_Mask302

Font used Bustamalaka  Size 16 Bold 
*******************************
Drop shadow used in all layers was
Vertical: 2  Horizontal: 2  Opacity: 45  Blur: 14.00

To finish add any other details and your copyright.
Make sure to save your work then you are finished.
*******************************
Hope this was easy and fun to follow!
Thanks for trying my tutorial.


Friday, June 5, 2015

New CT Tutorial For PinkParadox Productions Using Kit **Nautical Beauty**

Nautical Beauty

This tutorial was written by me on June 5th, 2015. Any resemblance to any other tutorials is purely coincidental! You may not copy/paste any part of my tuts elsewhere, but you may text link to them for challenges etc!
*********
Supplies Needed:

**New CT Tag** Scrap Kit of choice, I am using a PTU Scrapkit called *Nautical Beauty* By Pink Paradox Productions.

You can find this kit and many other beautiful kits here.

Tube or Image of choice, I am using a PTU Tube Called  *By The Sea* By ©Laguna
You can find this gorgeous tube here.


Mask of choice
I used the mask called WSL_Mask218

Text of choice
My text is called Bustamalaka Size 16 Bold

Program Used: Paint Shop Pro X7
****************
Let's Begin

650X650 New Image Canvas-Transparent BKgrnd

Open your tube
Copy & Paste to canvas. Resize and Position add to center of canvas.

Open Element (121)
Copy & Paste to Bottom layer. Resize & Position add to bottom center of your work area. (Duplicate) and mirror image by pressing ctrl+B.

Open Element (117)
Copy& Paste to top layer. Resize & Position add to bottom and add off the the left of your last sand element.

Open your tube
Copy & Paste to layer just below Element (117). Resize and Position add to sand elements and add as I have done.

Open any paper I am using one that came with tube.
Copy & Paste to bottom layer. Resize & Position add to center and add your mask of choice.

Open Element (69)
Copy & Paste to top layer. Resize & Position add to center top.

Open Element (64)
Copy & Paste to layer just below element (117). Resize & Position add to left side and blend in behind element (117).

Open Element (103)
Copy & Paste to layer just above your mask layers. Resize & Position add to the water on your mask layer as I have done.

Open Element (156)
Copy & Paste to layer just above element (121). Resize & Position add to top part of your work off to either side. (Duplicate) mirror image by pressing ctrl+B.

Open Element (149)
Copy & Paste to layer just above element (156). Resize & Position add to your left side to the bottom part of palm tree.

Open Element (177)
Copy & Paste to layer just below tube. Resize & Position add to the sand element just under tube.

Open Element (109)
Copy & Paste to layer just below tube. Resize & Position add to right side next to your dolphin.

Open Element (105)
Copy & Paste to layer just above element (121). Resize & Position add to back of tube.

Open Element (142)
Copy & Paste to layer just above element (105). Resize & Position add to right side corner of fence.

Open Element (160)
Copy & Paste to layer just below tube. Resize & Position add to behind tube and blend in. (Duplicate) to make your net darker so you can see it.

Open Papers (Did this step above)
Copy & Paste to bottom
Resize & Position to fit your canvas.

Add mask of your choice.

*******************************
Drop shadow used in all layers was
Vertical: 2  Horizontal: 2  Opacity: 65  Blur: 13.00
To finish add any other details and your copyright.
Make sure to save your work then you are finished.
*******************************
Hope this was easy and fun to follow!
Thanks for trying my tutorial.


Wednesday, June 3, 2015

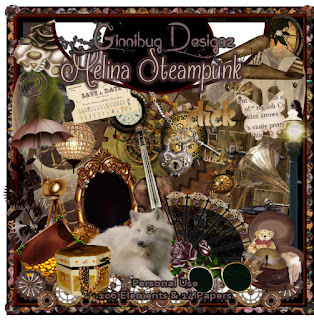
CT Tags For Ginnibug Designz - Using Kit "Melina Steampunk"


♥CT for Ginnibug Designz♥

The Gorgeous Scrap kit used is called ♥Melina Steampunk

Melina Steampunk kit is made to match
Chris Pastels Melina tube. Great Elegant Steampunk kit
Lots of cute stuff to work with.
Comes with 106 Elements & 14 Papers

You can find this gorgeous kit here.
S&Co: http://scrapsncompany.com/index.php?main_page=product_info&cPath=112_467_123&products_id=10644

In both tags I used the art by © Arthur Crowe
Tubes can be purchased here:
http://arthurcrowesfactory.com/store/index.php?route=common/home


Tuesday, June 2, 2015

CT Tags For Pink Paradox Productions - Using Kit "Message In A Bottle"


♥ CT for Pink Paradox Productions♥

The Gorgeous Scrap kit used is called ♥Message In A Bottle

This fantastic kit is super !
 Fun to work with! Endless fun..
Designed to match the stunning *Hot Summer* by verymany.

This kit comes with  175 Elements, 15 Frames, and 50 Papers
You can pick it up here for  35% off for a total $1.72
http://pinkparadoxproductions.com/store/index.php?main_page=product_info&cPath=1_2&products_id=517

In both tags,  I used the art by Verymany- Tube name: Hot Summer
Tube can be purchased here:
http://verymanytubes.com/tubes/hot_summer

Monday, June 1, 2015

New CT Tags For Fedor Using Tube **Madison**


♥CT Tags for Fedor Official Fan Group♥
Tube used is by Fedor called ♥Madison

This gorgeous tube comes with different layer
to chose from. You can find this gorgeous tube here
PFD: http://picsfordesign.com/catalogue/id_118966_madison.pix